Change Colors Using Blending Modes in Photoshop
Adobe, Photoshop
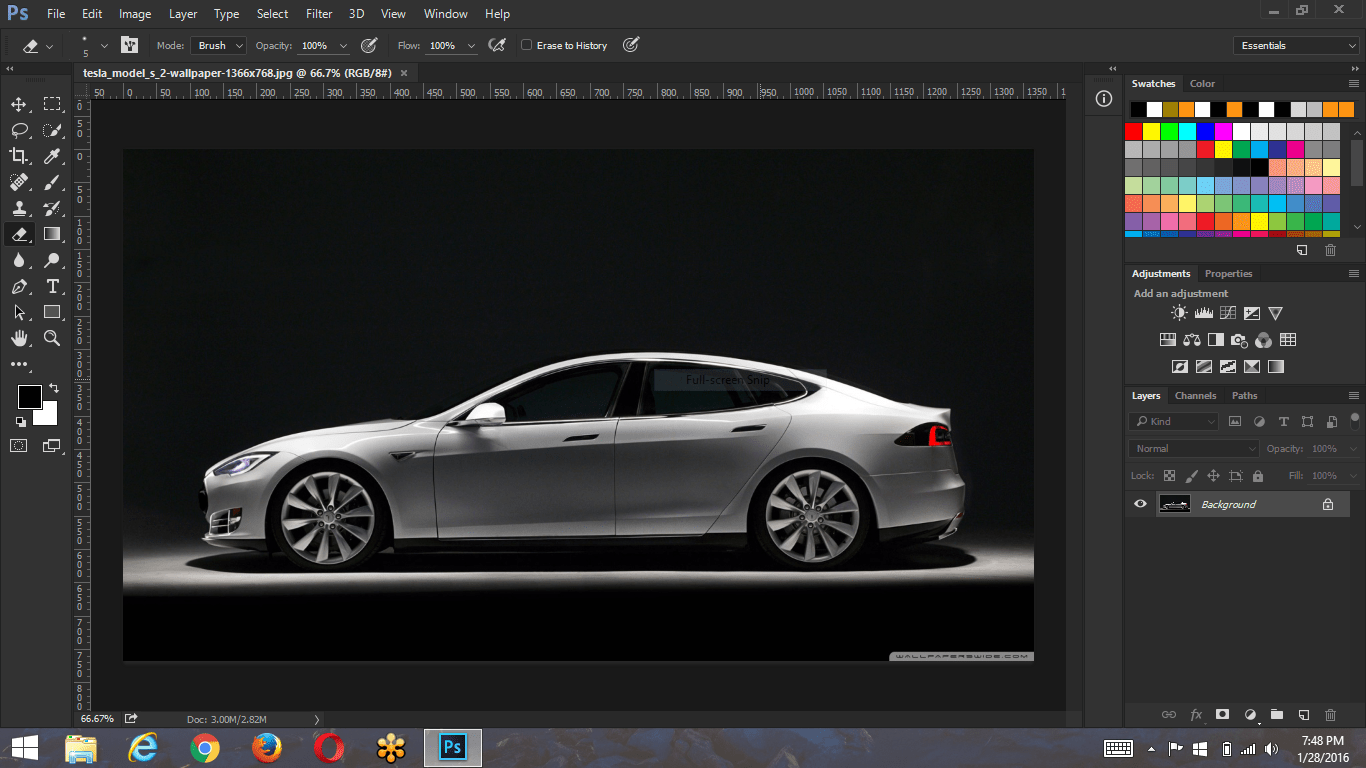
There are times when everything about the picture you’ve just taken seems to be perfect. Then, when it comes time to use it, you discover one key color just doesn’t work. Or you need the same item in more than one color.
Using Photoshop one solution is to apply the color needed to a new layer and change its Blending Mode.
Take our automobile example for instance. The photograph captures the essence of the car but the ad needs to feature a new, hot color.
Our first step is to add a new empty layer above the car layer. There are several ways to do this but we are only going to mention one which is the keyboard shortcut; Ctrl+Shift+N on Windows , or Cmd+Shift+N on a Mac.
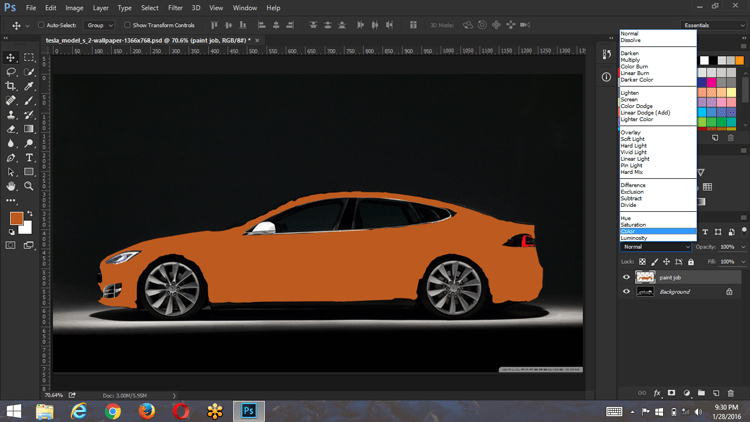
This adds a new layer above our background layer. We’ll rename this new layer “paint job” by double clicking the name in the Layers Panel and typing the new name in its place.
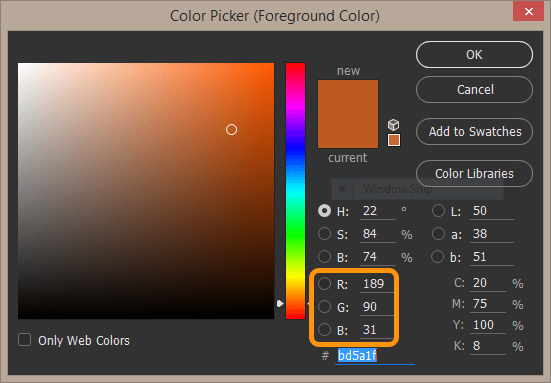
Next we’ll change the foreground color in the Tools Panel to the new color we want on our car. If you know the RGB color value you can click the foreground color swatch to open up the Color Picker Panel. Then type the RGB values in the appropriate location and click OK.
With a new layer in place and the color we what selected the next set would be to use the Bruch Tool to paint over the car on the new layer. It doesn’t have to be perfect, we can clean things up later.
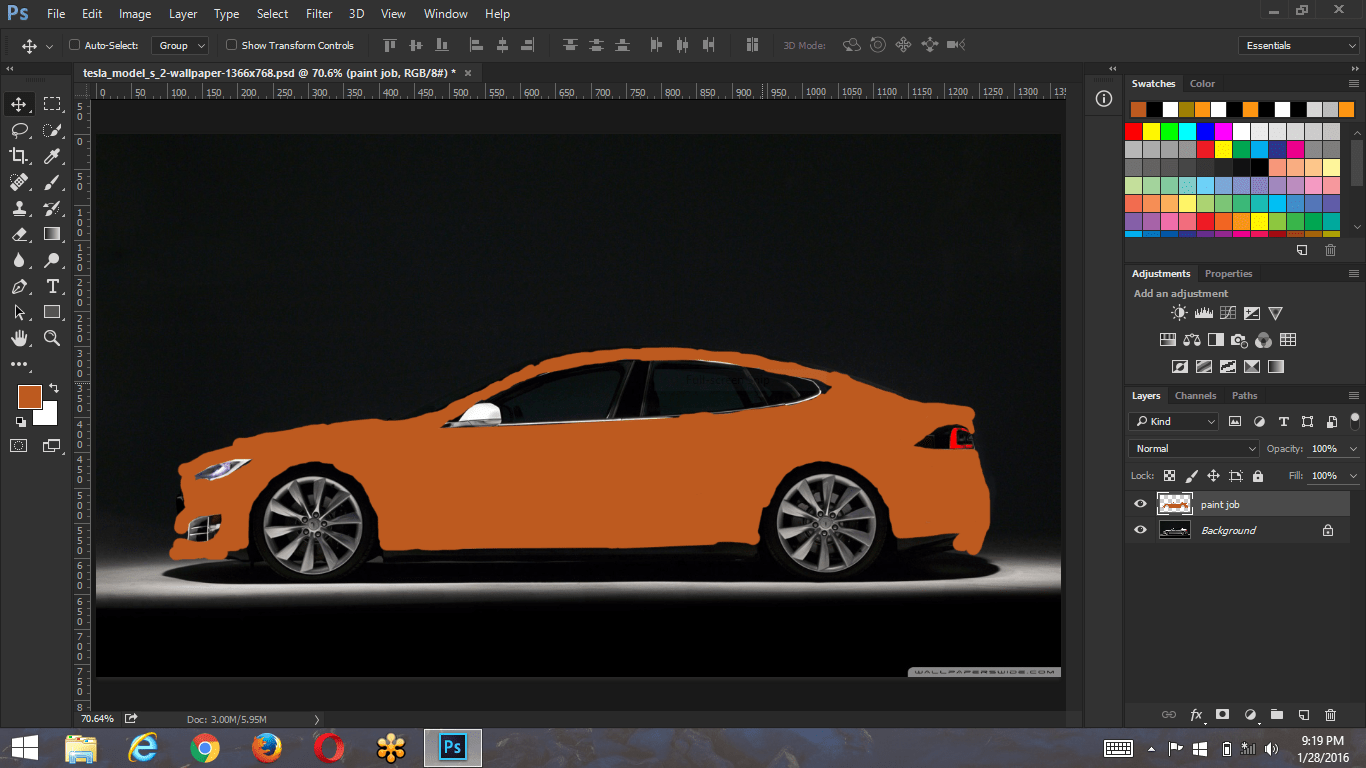
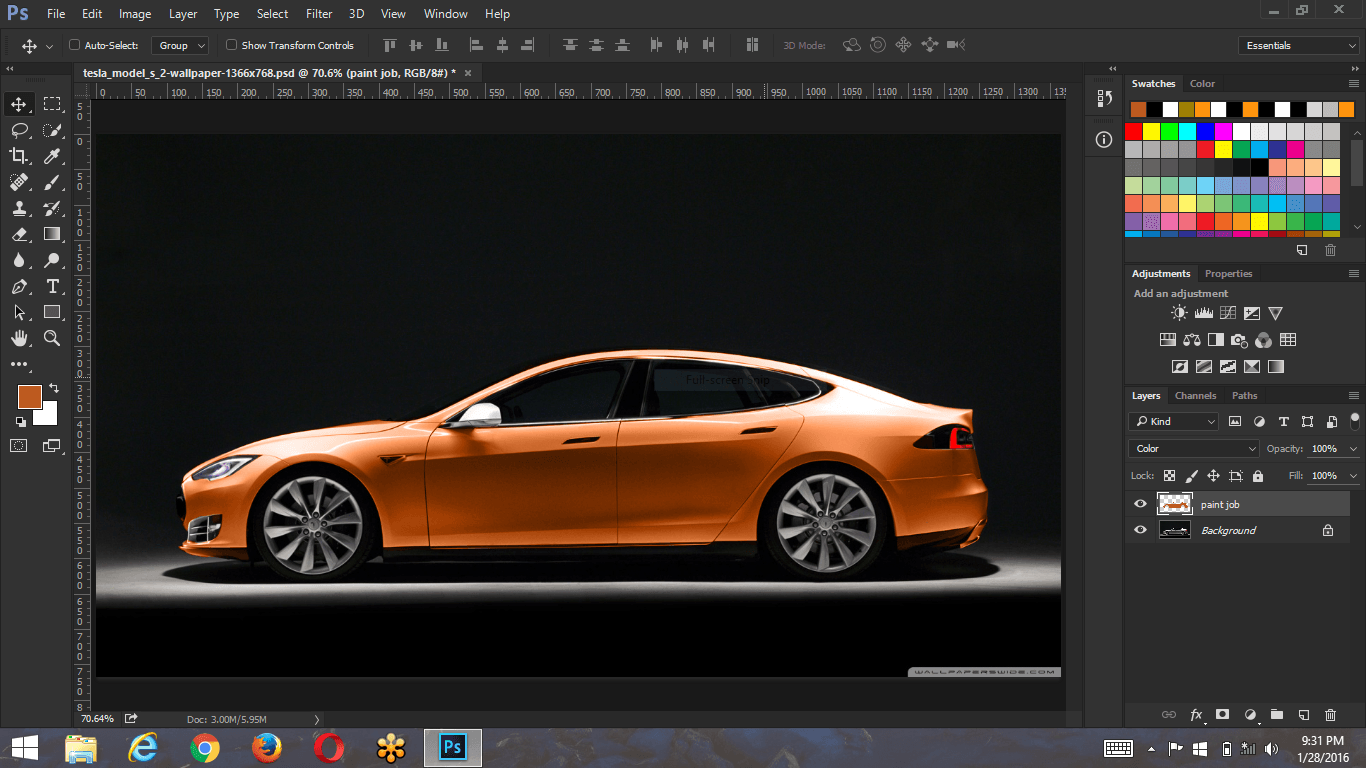
The magic happens in our next step. Once we’ve painted over the existing color and it looks like our next example image we change the Blend Mode of this new “paint job” layer from Normal to Color.
Voila! A new car with a new paint color. There may be a little clean-up work needed on the “paint job” layer, but that can be handled with the Eraser Tool.