Convert a PowerPoint Presentation to Video
Microsoft Office, PowerPoint
This tutorial applies to PowerPoint 2013, but several earlier versions of PowerPoint possess the same abilities. The exact steps and options will vary slightly from version to version.
Showing your PowerPoint masterpiece can be thrilling, but what if you want to reach a wider audience? How can we take our presentation from the confines of the boardroom (or is that bored room?) and set it free so the world can bask in its glory?
Very easily; we convert it into a video.
In this tutorial, we discover a feature introduced in PowerPoint 2010 which allows you to take your slides and encode them to a video that can be loaded to your corporate network for on-demand viewing through an intranet portal, or posted to a more globally accessible site such as YouTube.
Step 1 – Create your presentation
This step is all on you, so we’ll assume for the sake of this tutorial that you have completed your presentation. So, on to the next step.
Step 2 – Access the Backstage and Export tools
The Backstage is where all of the file management takes place; like saving, opening, printing, and converting to PDF. We need to click on the File tab, select Export from the menu, and then Create a Video. This will present us with the various encoding options.

Step 3 – Setting the encoding options
The first dropdown lets us choose from three different video resolution settings.
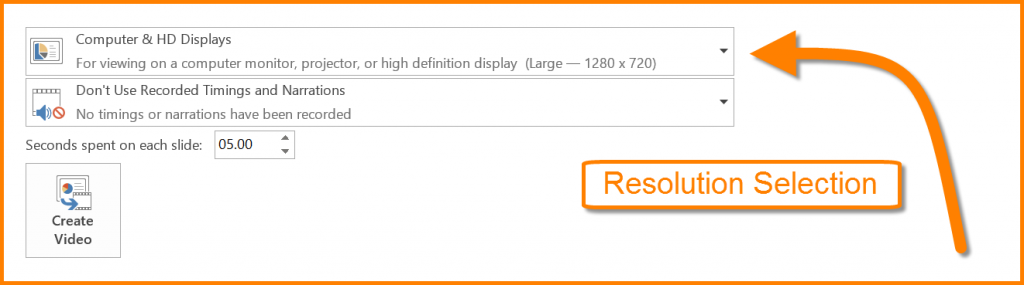
Depending on your slide dimensions (Widescreen 16:9 or Standard 4:3) you will see one of two sets of options:
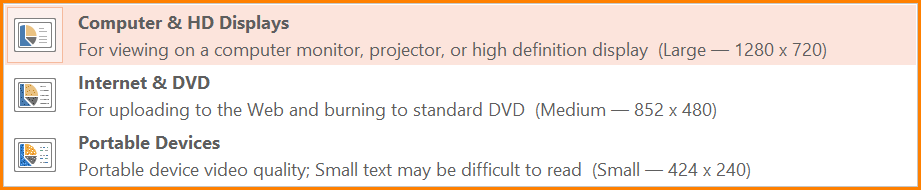
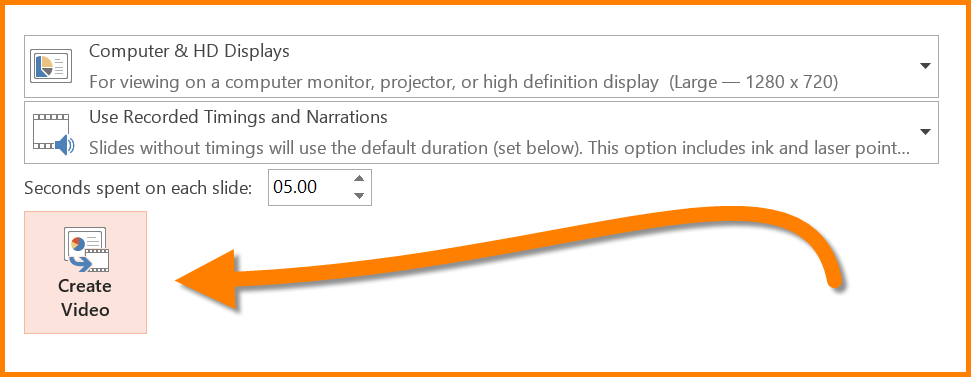
- 1280 (or 960) × 720 – this is essentially DVD quality and well suited for computer displays, televisions, and projectors. The downside to this option, if it even is at all, is that the file size can be quite large with presentations that are heavy on the graphics side.
- 852 (or 640) × 480 – this is also close to DVD quality and appropriate for Internet uploads. It offers a nice balance between quality and file size.
- 424 (or 320) × 240 – this is acceptable for viewing on mobile devices and yields the smallest file size, but viewing it on anything larger than a mobile phone may be quite disappointing due to the low resolution.
Step 4 – Defining the timings and narration options
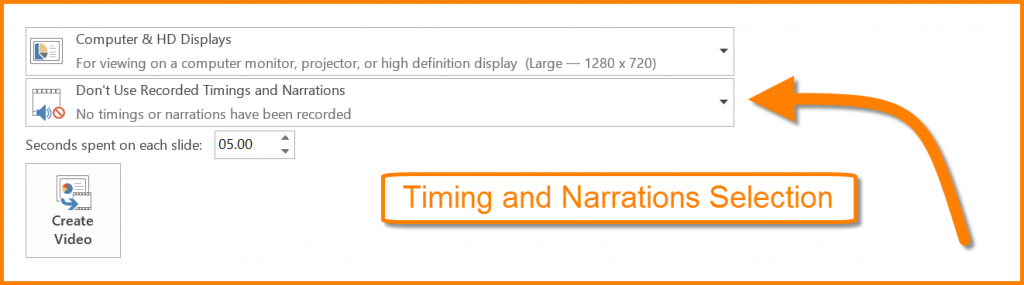
The second dropdown allows you to utilize the embedded timings and narrations or to omit them from the finished video. You also have the option to record and/or preview timings and narrations if you weren’t using them in the original presentation.
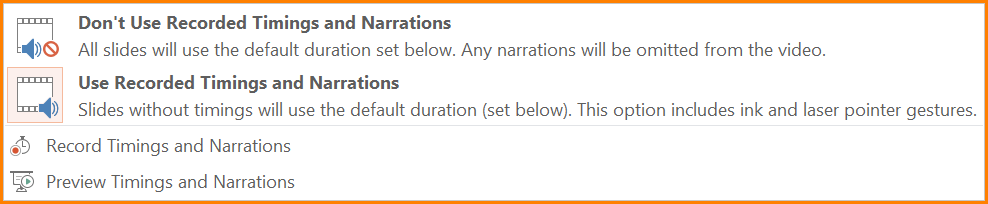
Properly timed slides provide your viewer with the necessary time to read the content at a relaxed pace without feeling rushed, or drag so slowly that the viewer gets bored and tunes out.
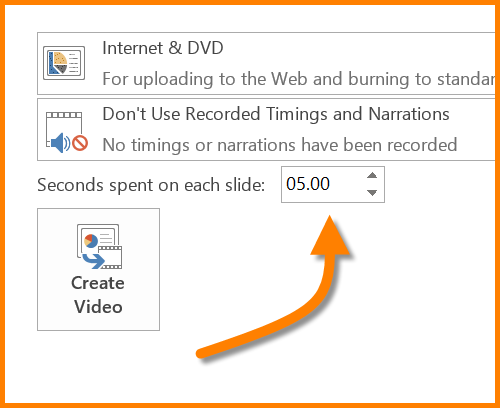
What if you don’t have any embedded timings to advance your slides and you have neither the time nor the ability to create such? What if some of your slides have advancement timers attached to them, but there are some that don’t? Fear not. The Create a Video tool has a “catch all” timer setting for any slide or slides that do not advance themselves after a preset amount of time. Set the “Seconds spent on each slide” to a value equal in seconds to advance any slide that does not have an attached advancement timer.
Step 5 – Generate the finished video
After you have selected your encoding resolution and your timings options, click the Create Video button.
You can choose between two encoding strategies:
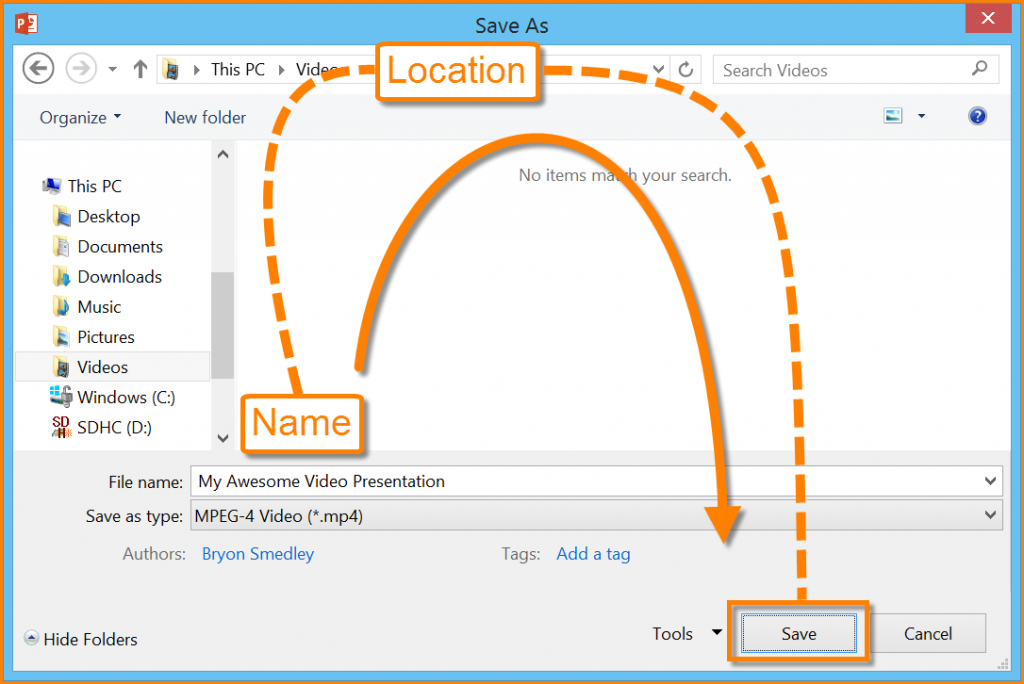
- MPEG-4 Video (.MP4)
- Windows Media Viewer (.WMV)
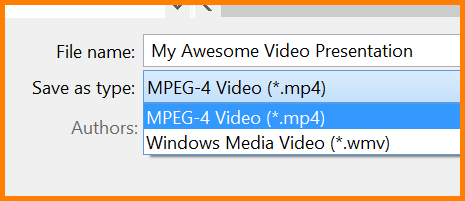
Both of these formats have their pros and cons, so you may wish to generate a version of each and examine the differences in quality and file size.
Give your video presentation a name and a place to live, then click Save. If you are distributing this solely in a corporate environment, consider saving the video to a shared network folder or passing the video on to your intranet developers so it may be posted to your internal corporate website.
During the conversion process, a progress indicator will be displayed towards the lower right corner of the PowerPoint windows. Depending on several factors; number of slides, variety of content (graphics, backgrounds, colors, images), animations, timings, etc…, the encoding process may take anywhere between seconds and minutes.

Once the encoding process is complete, you are now ready to distribute your presentation to anyone with a compatible playback device.