How to Create a Calendar in Project (and Why)
Microsoft Office, Microsoft Project, Project Management
When setting up a plan in Project, it’s very important to get the calendar organized first, before adding tasks, resources, assignments, or almost anything else. Why? Because a project timeline dictates many of the scheduling details, and the calendar controls the schedule.
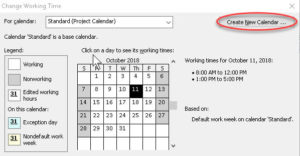
Getting to the dialog is easy—we click the Project tab, slide to the Properties group, and click Change Working Time. Once there, we usually want to click Create New Calendar at the top right, since copying an existing one and modifying it leaves the originals for later use.
We can then change the name of the copy, say, to the company name or the project name. (Calendars are file-specific.)
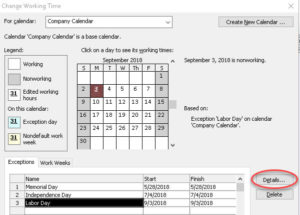
Then we need to add the usual holidays. The good news is, it’s rather like doing so in Outlook; if you use that program for scheduling, the technique is similar. Select the day, go down to the Exceptions tab, and put in the name. Selecting multiple days is fine, too.
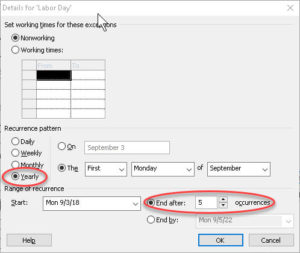
Clicking the Details button on the right lets us set the holiday, Labor Day for example, to repeat. It’s a good idea to keep the number of repeats fairly low, no more than ten. Unless the project is REALLY long-term, it’s not necessary…unless you want to have the file turn into a template for other projects. Even then, going for more is usually rare.
Although it’s possible to edit a calendar later, just before or even during the run of a project, it’s highly advisable to get it as polished as you can beforehand, and to avoid editing it later, if at all possible. Any changes during the execution of the project will almost certainly change the schedule, and often in a way we can’t predict.
This is one part of any project which really needs close attention, because it can critically affect almost every other part to some degree.
For more on this, check out our Microsoft Project classes.


