Creating Cost Resources in Microsoft Project
Microsoft Office, Microsoft Project
There’s a quirky thing about Microsoft Project, having to do with resources—more specifically, Cost resources. The other two types, Work and Material, are pretty easy to understand and use, but Cost takes a little bit of extra work to make do its thing.
A Work resource is a person or a piece of equipment, someone or something that stays around. A Material resource is a consumable, such as reams of paper or toner cartridges—something we use up. Even gasoline might be looked at this way. But Cost resources, at first, seem a little more indescribable. And where to put the actual cost?…
The basic definition, though, is not too hard once you understand it. A Cost resource is an intangible, like an airfare, a hotel rental, or a software download. It’s something you use, but can’t exactly hold in your hand.
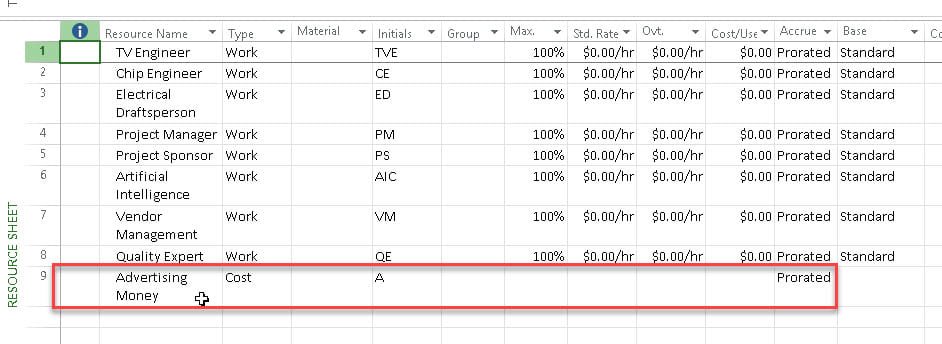
So how do we use it? First, we have to create the resource, say, Advertising Money. We can’t insert any numbers in the Resource Sheet, because—and here’s the key thing—a Cost resource has to be attached to a task in order to enter a number. In other words, you have to specify where the money is going.
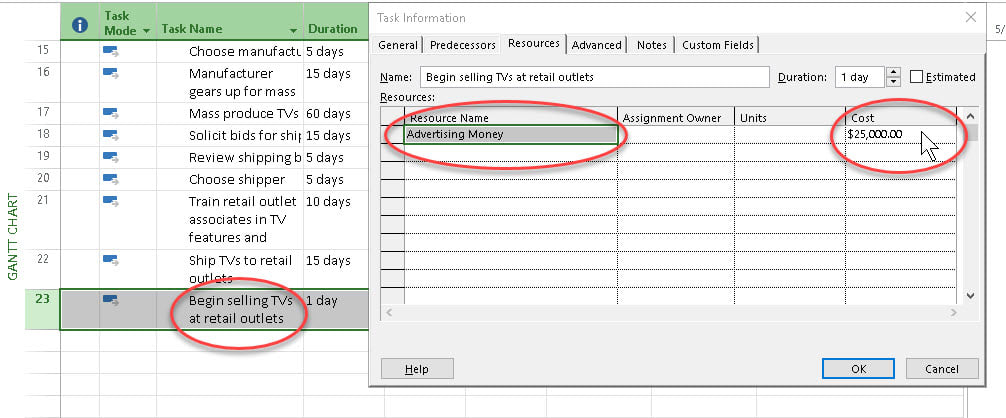
Then, in the Task Information dialog box, we set up the assignment of the resource, and there we can enter the amount. Since the program tracks all the costs, it’s not really too big a deal where we enter the numbers, as long as we enter them.
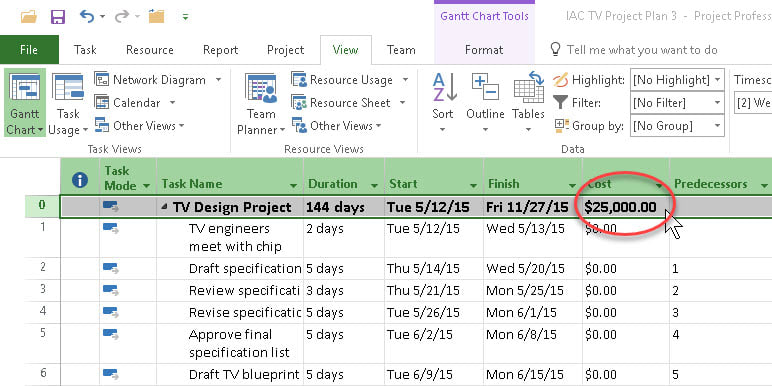
Later, when we need to know what all the Cost resource numbers add up to, the information is pretty easy to get. One simple way to check it is to add the Cost field to the Gantt chart. The Project Summary Task gives us the overall amount in that column.
Once you understand it, dealing with it is routine. It’s a good thing, because it gives the project manager a means of keeping better track of the money. Never hurts….
To learn more, look into our Microsoft Project training.