How to Create a Preflight Profile for Adobe InDesign
Adobe, InDesign
When working with InDesign, we need to “preflight” files we intend to print. A pilot will inspect an airplane before flying it, which is where the term comes from. Similarly, we check a file for various potential problems before we print it. And if it’s going to a commercial printing business, this is even more important. A LOT of time and money could be wasted if we don’t. A preflight profile is how we deal with it.
A profile is a set of rules we need the document to follow. You can think of it as rather like your mental checklist when pulling out of the garage. Doors closed, belts on, open garage, turn on engine, check mirrors, put in gear, ease out…and so on. In a document, we could say: CMYK colors only, no overlaps, max of three fonts, nothing hanging over page edges, or whatever else. So the rules can be whatever, but you have to have an idea of what they need to be first.
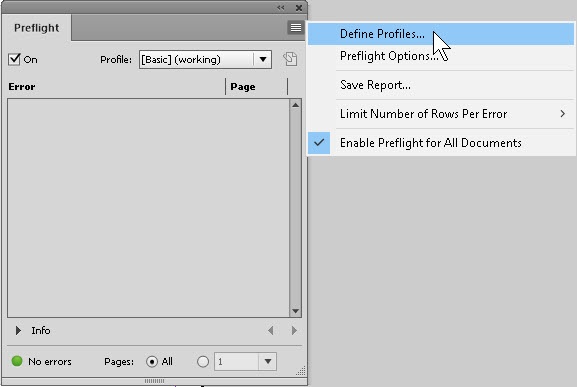
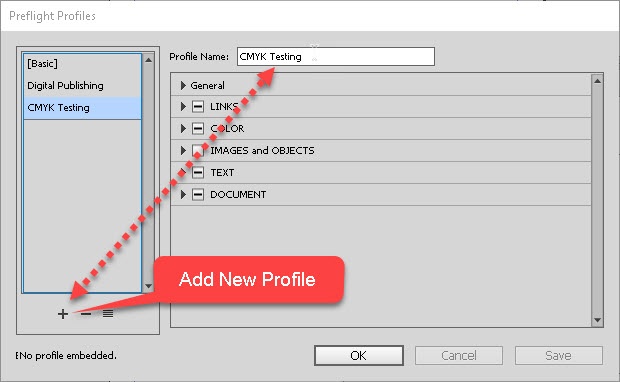
To create a profile, we go to Window->Output->Preflight. In the panel, we go to its top-right menu, and select Define Profiles. Once in the dialog box, we click the “+” button at bottom left, and give the new profile a name. Usually it should describe something we’re aiming to do with it, such as “CMYK Colors Only.”
Then comes the fun part. Best to have this sort of thing on paper first. What we now need to do is go through the list of rules, and check the ones we want active. What do you want or not want the profile to look for? Usually we talk to the client, or boss, or coworkers and jot down what’s needed. A few of the more common items for print purposes would be:
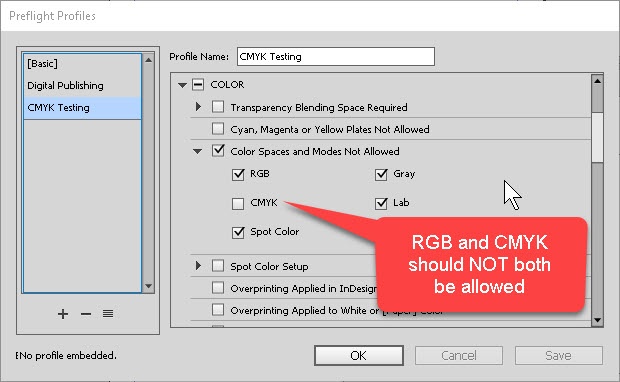
- Color/Color Spaces and Modes Not Allowed (this is where we tell the profile “CMYK only”)
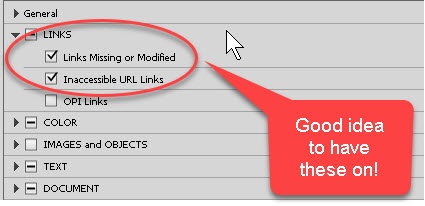
- (Look for) Links Missing or Modified (we don’t want blank spaces where pictures should be)
- Determine if we’re allowing spot colors (custom-mixed colors for, say, product branding)
- Images and Objects/Image Resolution (max and min to keep the document size reasonable)
This list is by no means all-inclusive. But it does give an idea of what one can tell the program to watch for.

This example has a small problem. Most of the file is fine, but the Preflight profile says there are some missing links. Specifically, it doesn’t know where to find the pictures that need to be in the document. This is a fairly common problem, and easy to solve. We simply navigate to the image(s), and the program reconnects things.
N.B.!
About the only really significant routine problem has to do with fonts. If the fonts we use to create the document aren’t on the computer we use to print, those fonts have to be bought and put on the printing computer. Or substitutions have to be made—InDesign can do this. But it is a question you may need to consider, so be careful.
For further information on the Adobe Creative Cloud programs, take a look at our Adobe InDesign courses.