How to Create a Template in Microsoft Project
Microsoft Office, Microsoft Project
A template in Project, as in most other programs, is a blank form. We fill in the spaces, as on a tax form or license application. The more complex the job, the more complex the form. So when we’re managing a project, any help we can get doing a bunch of similar projects is really good.
The key is having a project file that’s mostly or entirely complete—i.e., the project is done. Because if we know the project ran successfully, we can frequently use it to guide others of the same sort. So we open the file in question, and see what we need to do to make it “generic”, the first stage of the template.
First, we need to clear out the constraints, because they are often time-specific. If we don’t, we might run into trouble changing the project start or finish date in the template. The constrained tasks will “stick”, and prevent the overall timeline from updating.
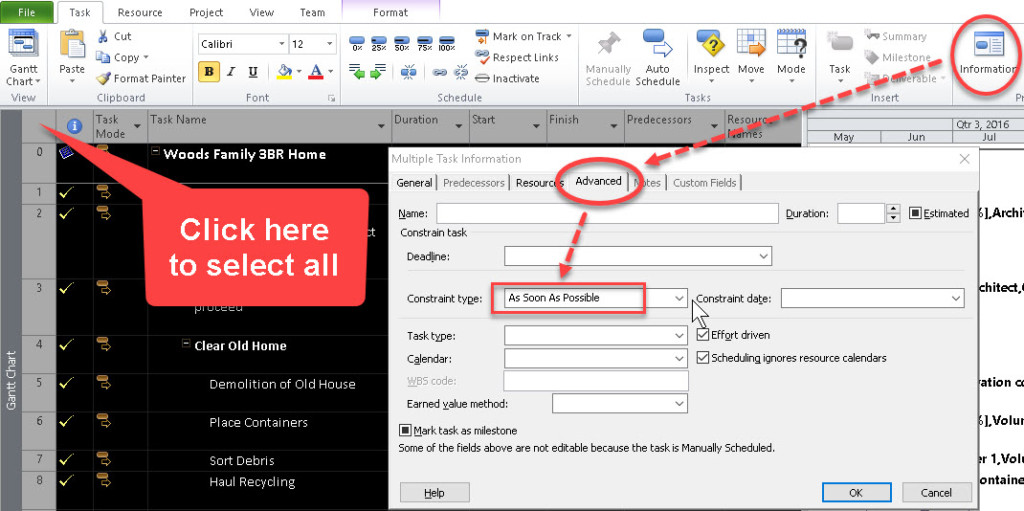
Turns out there’s a way to do this for the entire project. We select all the tasks, open the Task Information box (Task tab->Properties), and set the Constraint type under Advanced to As Soon (or Late) as Possible. Don’t forget to mark them all as 0% complete. ?
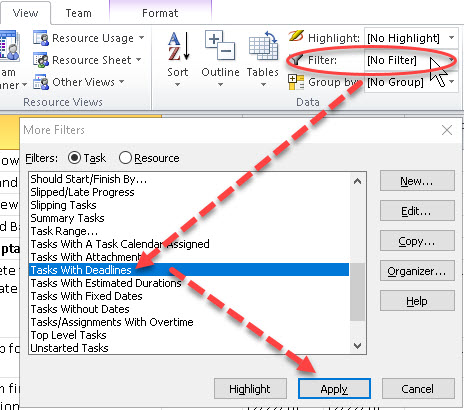
We should also clear deadlines, of which most projects (and templates) won’t have tons. We can even filter for them. Going to the View tab->Data group->Filter dropdown and clicking More Filters… will show them.

And we need to set all the tasks to Auto-Scheduled. Otherwise, again, they won’t allow date changes when we need to start a new project. We can again select all, go to the Tasks tab->Task group, and clicking the Auto Schedule button.
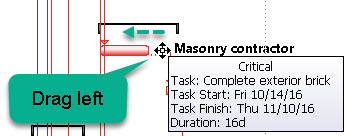
We have to check for splits in the tasks, regardless of the reasons, and drag the task piece on the right side of the split back to the left. In most cases, these are due to things which won’t happen again in a similar project. So they need to be eliminated from the template. This is one of the few things we can’t do all at once. Luckily, splits aren’t common in projects.
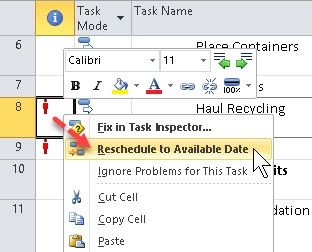
Next, we clean up overallocations. Right-clicking on each and using “Reschedule to Available Date” is the simplest solution. Overallocations are sometimes harder to deal with. We often have to balance time and resource constraints, and there’s no single answer to the problems. But when setting up a template, it’s important that we do the best we can. Going from top to bottom is usually safest because of how it affects the schedule.
One other optional thing might have to do with resources. If you plan to have the same ones on projects each time, you can leave them in. Otherwise, you may need to do some work on the resource sheet.
Lastly, we save the file as a template. File->Save As, of course, and change the Save As Type to Project Template.
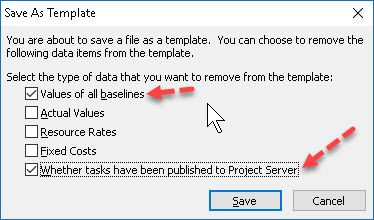
Please note: In the dialog box we see upon saving, what you check is what you remove. The two things we tend to need least in a template are the first and last ones. We normally clear baseline data because it’s time-specific as most data are here. And the Project Web App (according to my students) doesn’t see much use at this time. So we check those two, leave the others in (as they don’t change a lot from use to use) and save.
Yes, it’s a bit of a laundry list. But a template in any program has certain requirements to work as a “blank form”. So it is here.
To get into Project, take a look at Microsoft Project training.