Using the Cost Tables in Microsoft Project
Microsoft Office, Microsoft Project
The Cost Tables feature in Microsoft Project reflects a point which is particular to this program—it is, basically, time-sensitive. Since a business project takes a minimum, usually, of several weeks to run, the project must take time into account. And, no pun intended on this phrase, accounting for costs which might change during the run of the project is therefore an integral part of the resource data we can (and often must) enter.
Fortunately, the first part is pretty easy. When creating a resource, one can (in the Resource Sheet) start by entering standard and overtime pay rates for a work resource (usually a person or group of people).
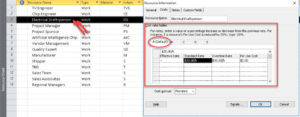
If, however, one knows the resource’s pay rate will change at some time during the course of the project, opening the Resource Information dialog box and going to the Costs tab gets us to the cost tables. (Just double-click the resource to get in.)
There are no less than five Cost Tables in any resource’s info box. We usually need just the first one. Each contains twenty-five rows, so there are 125 slots for cost table data. If there are going to be that many changes of rate, it’ll be WAY out of the ordinary.
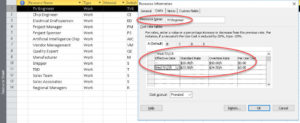
So in Cost Table A, the default, we enter the initial standard and overtime rates, if they aren’t already in the Resource Sheet. The assumption is, these rates are in effect at the start of the project.
In the next row, we enter the date at which the rate will change, and the changes themselves. We can even enter a percentage change (+15%, say), instead of a straight number, if someone doesn’t actually know the amount but does know how far up or down it should go. And repeat as needed.
The project manager has to be conscientious about entering the info ASAP. Preferably before the project start date, to make sure the budget numbers stay current. But the actual entry of the data is pretty straightforward, thanks to the cost tables.
To learn more, take a look at our Microsoft Project classes.


