What’s New in Microsoft Office 2010 – Part 1 of 6
Microsoft Office
With every new release of Microsoft Office (or really any software product for that matter) users of a previous version ask themselves the question “should I upgrade?” And, as always, the answer is…it depends. I’ve collected a few of the new features of Office 2010 to hopefully help you make your decision. However, if you’re one of the many folks who didn’t move to Office 2007 because of the new Ribbon interface – you may want to seriously consider Office 2010. It corrects some of the confusion introduced by the Ribbon interface and adds quite a few useful new features as well. In this post, we’ll explore some of the new features that are common to most, if not all, of the Office 2010 applications. In future posts, we’ll highlight some of specific new features in Word 2010, Excel 2010, Outlook 2010, PowerPoint 2010 and Access 2010.
Office Button Replaced with File Tab
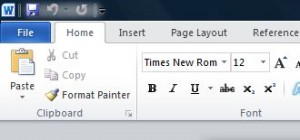
One of the key features of just about every Microsoft product ever released was the consistency of the menu structure. Even if you had never used Publisher, for instance, you could open the program and you immediately know how to do some basic stuff – like save, open or print a file. And the reason for that, of course, was that Microsoft placed those functions under the File menu in every application. Microsoft Office 2007, as most know, broke this paradigm by placing these common functions in something called the Office Button. A large, circular Office logo that sat in the upper left corner of the screen. It made little sense, especially considering that the one of the main reasons Microsoft introduced the Ribbon interface was because users often didn’t even know a specific feature existed in Office, and Microsoft wanted to make things easier to find. Well, take heart. The File menu is back, sort of. There is now a File Tab in each application, which takes users to something called Backstage view.
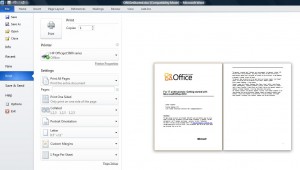
Now all the options that don’t help you change the document, but let you use it in various ways or add metadata to it, have been moved to Office Backstage. Options like compatibility, versioning, distribution options and document properties are available in Backstage view. It also contains the usual options of opening files and saving in different formats. The most welcome change is to printing options, which not only let you preview your document without opening a new window, but also (finally) do away with the Print dialog box altogether.
Save to SkyDrive
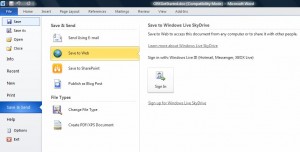
Although SkyDrive has been around for awhile, Office 2010 makes it easy to save and open files stored on it. Using your Windows Live account, you can store up to 25GB on your SkyDrive. That’s a lot of space, and it’s obvious Microsoft is directly targeting Google Docs by offering the free space and the ability to open and save files directly from Office. To save a document to SkyDrive, click File>Save&Send>Save to Web.
Improved Copy/Paste
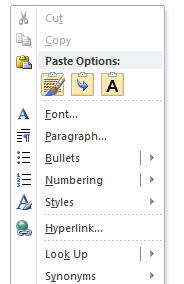
If you every found yourself frustrated when you pasted something into a document in Office 2010 and then had to click in *just* the right spot to access the menu to control how it was pasted, you will appreciate the new Copy/Paste options in Office 2010. Now when you right-click in a document and choose Paste from the shortcut menu, a new set of Past Options appear, giving you the option to choose formatting before you paste, rather than after.
Extract an Image
Although this new feature won’t be of use to many folks, it’s still a pretty cool addition – and will definitely be helpful if you have ever found yourself wanting to extract just a portion of an image to use in your document, but didn’t have access to (or knew how to use!) a picture-editing application. To use it, just select the image in your document, then click on Picture Tools>Format>Remove Background. Select the area that contains the picture and click Remove Background.
Screenshot Tool
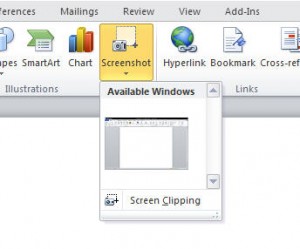
If you find yourself including screen-shots in your documents, either for training or documentation, you will really like this feature. You currently probably use Snag-It or another tool like it – or possibly you discovered the handy Snipping Tool in Windows Vista (haven’t found that yet? Just click the Windows Start button and type Snipping in the search box.) Now, the ability to take a screen grab has been added directly within Office 2010. Just click Insert>Screenshot from the Ribbon. You’ll have the option to capture the current window, another open window, or a portion of a window.
In our next post, we’ll take a look at the new features in Outlook 2010.