5 Tips for Photoshop Users
Adobe, Dreamweaver, Photoshop, Web Design
Sometimes it’s the little things that make all the difference.
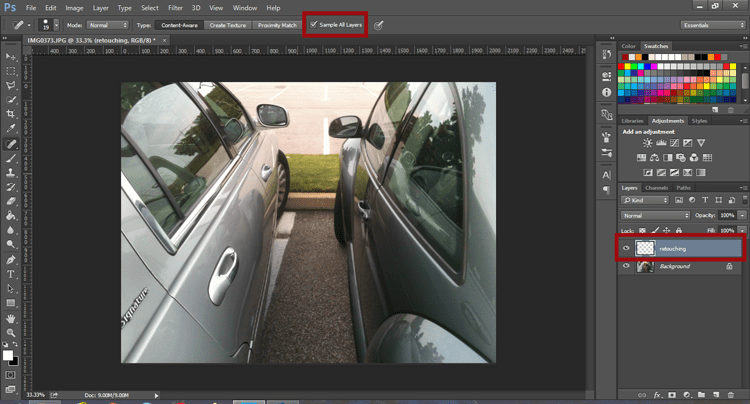
Tip 1: We’ve all used the ever popular Save As to prevent messing up a photograph and not being able to go back afterward and edit out our changes. A much simpler approach to work in a non-destructive manner on an image is to create either an empty retouching layer or an image copy retouching layer. When using the empty retouching layer approach remember to check Sample All Layers in the options bar.
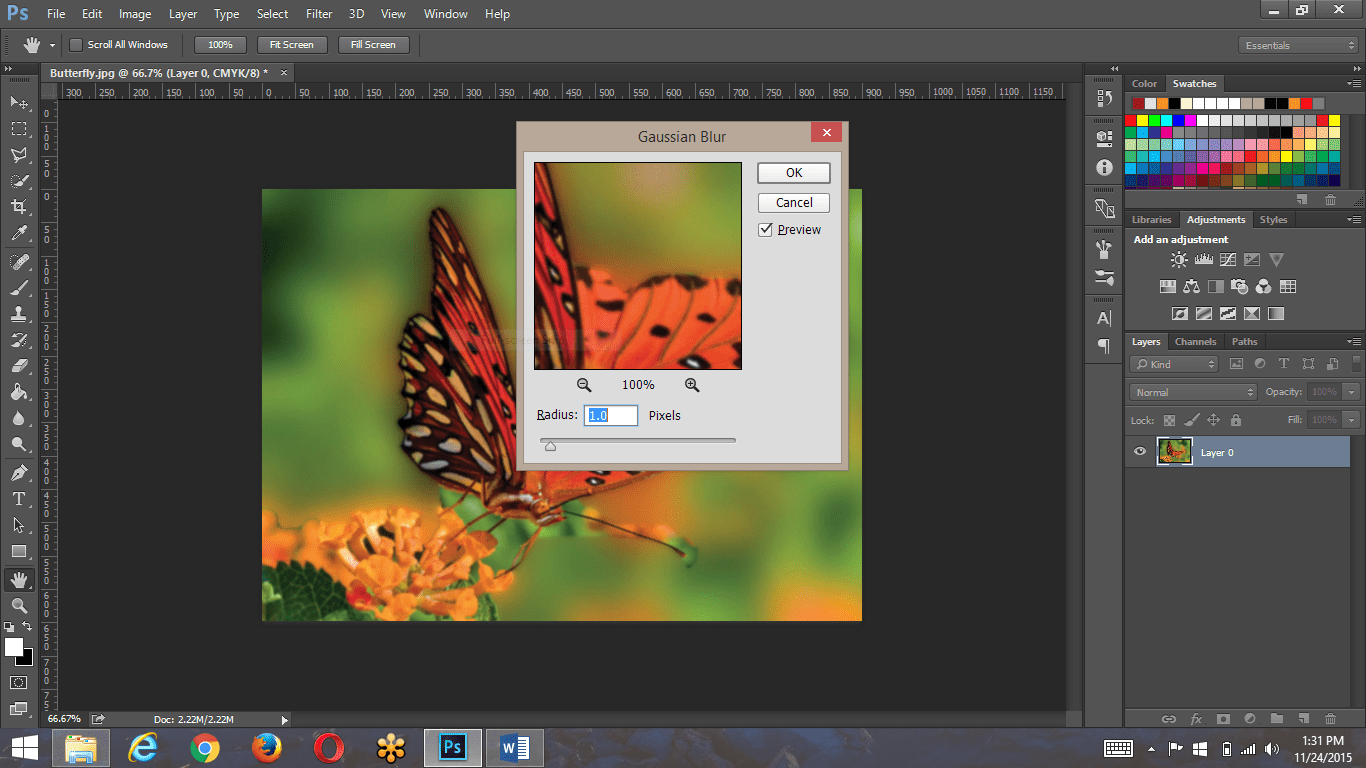
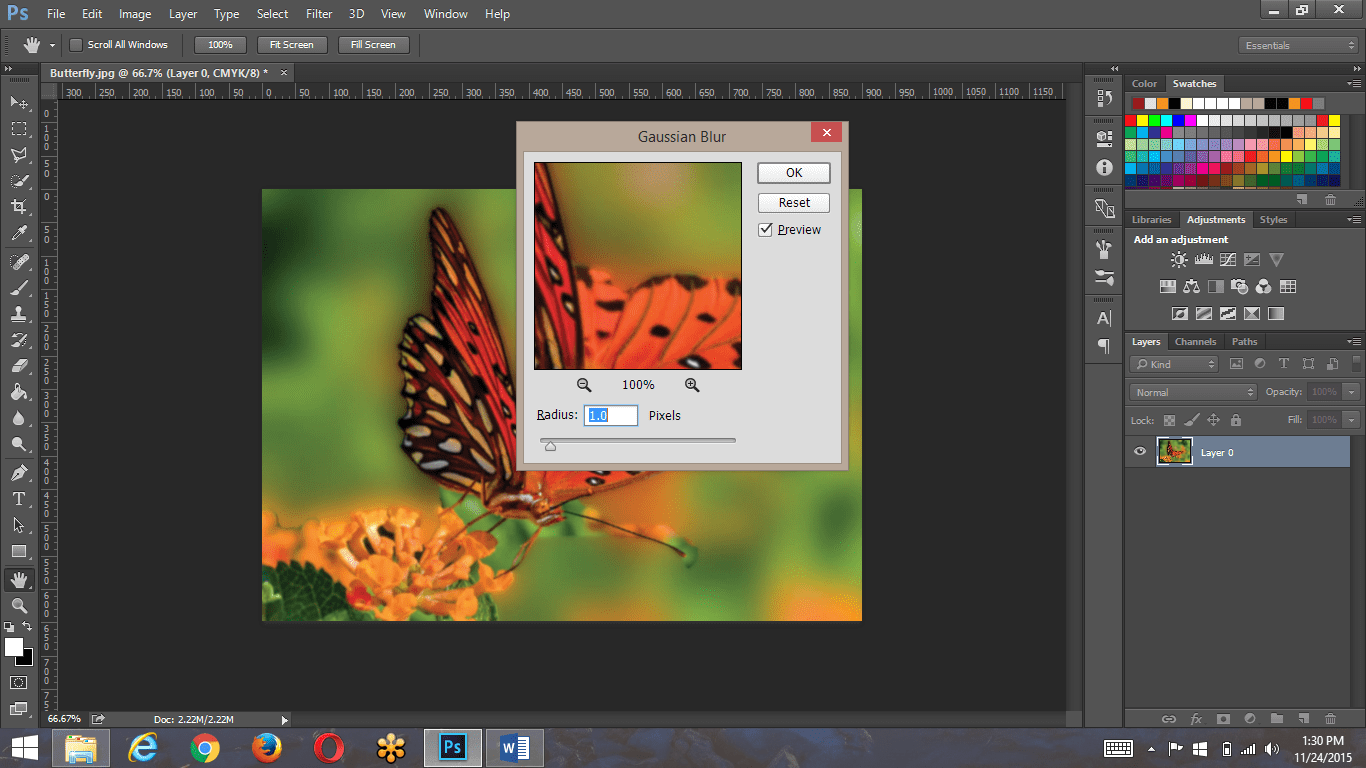
Tip 2: To return a property window to its default settings, simply hold down the alt key (Windows) or the opt key (Mac) and the cancel button will switch to a reset button. After clicking reset, simply release the alt/opt key and it returns to cancel.
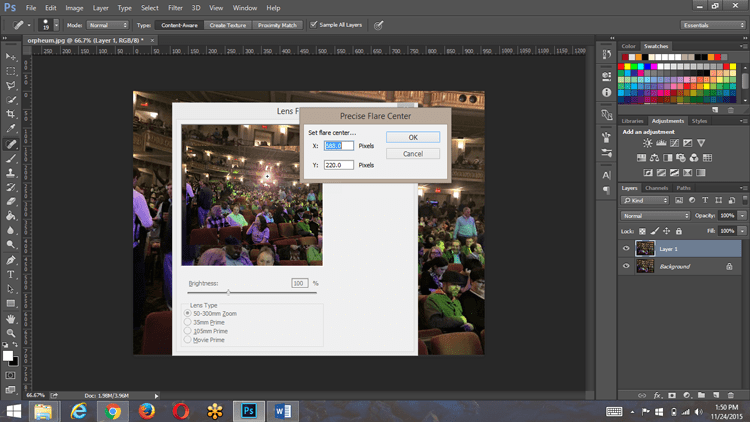
Tip 3: There have been several times over the years where an added lens flare was that last little touch to make an image complete. The frustration arose when trying to precisely place the lens flare where it should go. The lens flare property window is often times less than cooperative with this accurate placement. The solution involves using the info panel to find the x and y coordinates where the lens flare will go, and then alt (Windows) or opt (Mac) clicking inside the lens flare panel thumbnail image to bring up the precise lens flare property window. Plug in the x and y coordinates found earlier and it now rests exactly where we wanted it.
The last two tips are for people using Photoshop for web page design.
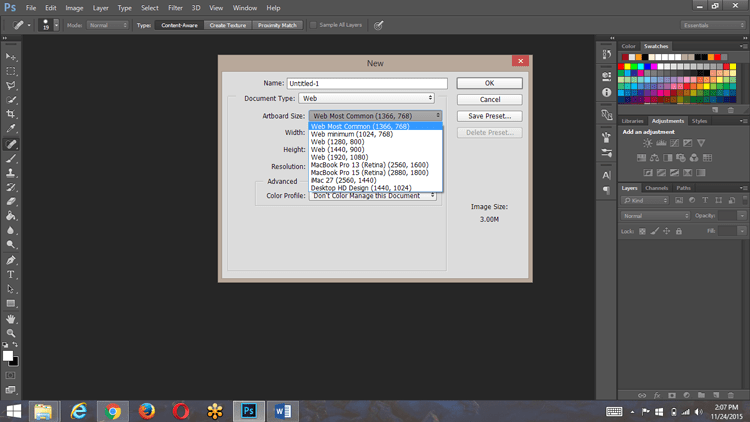
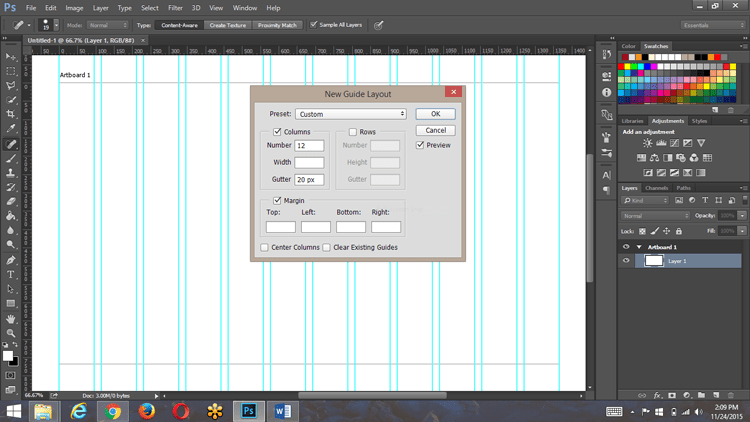
Tip 4: Photoshop makes it increasingly easier to design for the web. Not only do we have web page size choices as part of creating a new document, but we can also use the New Guide Layout window (found in the View menu) to establish a layout grid. Number of rows, columns, column width, row height, and margins can all be assigned from within this window. You can even save your favorite grid as a preset for use over and over again.
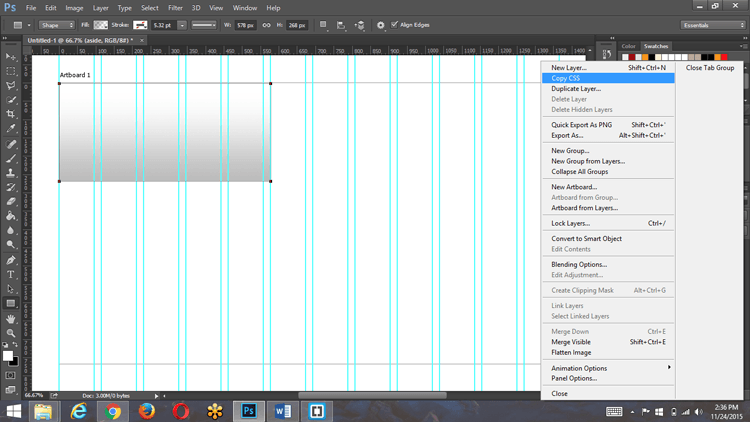
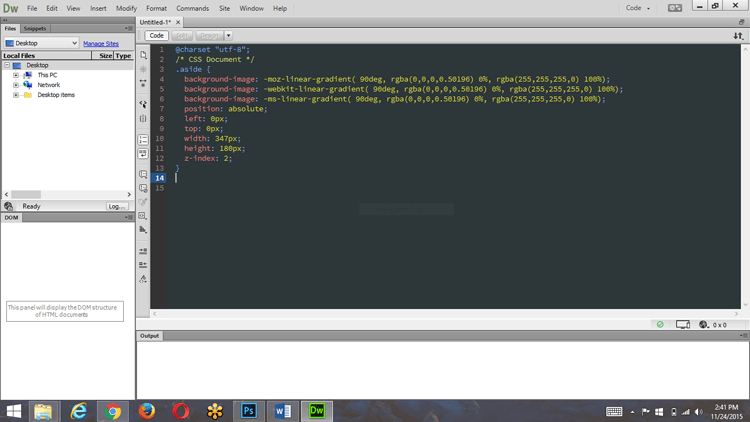
Tip 5: After establishing a grid to be used for your web page you can start placing images and shapes to accommodate text blocks. Once your layout is complete, let Photoshop tell you what CSS you’ll need to place each item in your page. Select the image or shape to be placed and use the layers panel menu Copy CSS command to generate CSS directly to the clipboard. This generated CSS can then be pasted into any text editor, such as Dreamweaver or Brackets. Photoshop will even generate CSS3 code for gradients, drop shadows, and rounded corners.
