Dealing with Dust Using History in Photoshop
Adobe, Photoshop
There’s another trick for dealing with dust in Photoshop (to sort of continue from the last blog post), which takes a little setup but is even more subtle. It involves the History Brush tool, and the History panel. The advantage is that the corrections are very unobtrusive, especially if one takes the time to do them carefully. The disadvantage, such as it is, is that the recipe has to be followed rather carefully, which is why I’m taking the liberty of condensing it at the end of the post.
After opening the file, it’s advisable to save it as a PSD, and make a copy of the layer containing the artwork; work on the copy for safety.
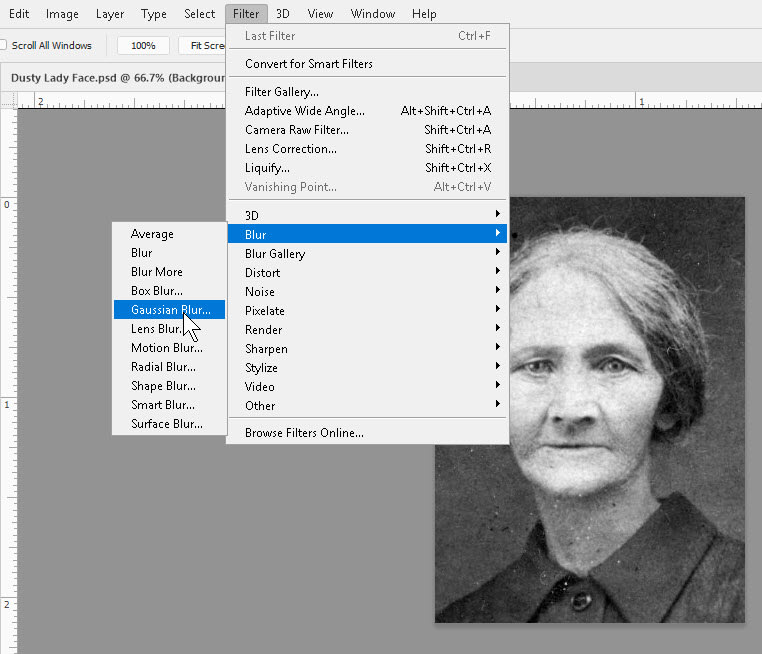
The first real step is to go to Filter—Blur—Gaussian Blur, and set it for 6-12 pixels (all numbers approximate; your mileage may vary).
Then, in the History panel, take a snapshot of this state (call it Blurred, or whatever you’ll recognize). After which, click one step up in the History (which will un-blur the art but leave the snapshot blurred). THIS IS A KEY STEP.
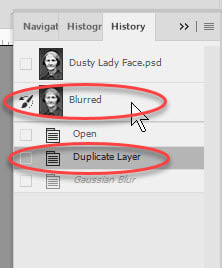
Click the selector for the blurred snapshot (left side of panel) to indicate what the History Brush should work from. Then select the History Brush itself in the Tools panel.
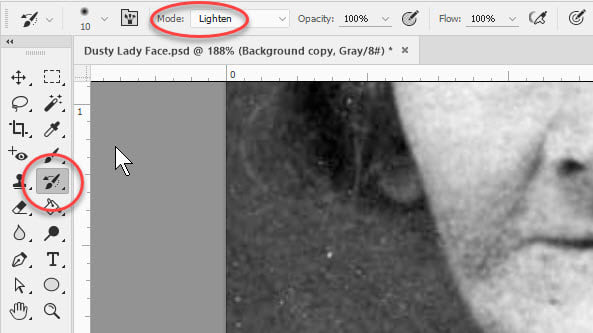
THE OTHER KEY STEP is this: When painting a dark spot with the History Brush, switch the blending mode in the Control panel up top to Lighten, and vice versa. So you’re lightening and blurring the dark spots, and darkening and blurring the light spots. Lightening or darkening makes them less conspicuous; blurring blends the repair in.
Before
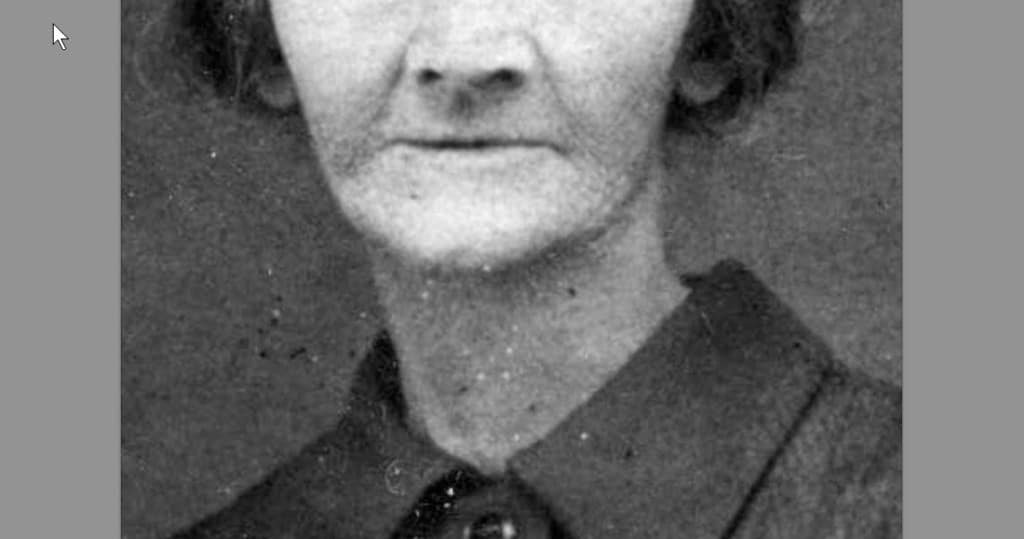
After

Don’t panic if you need to practice this one a bit. The recipe is a bit more complex, and has to be followed. But I can tell you it works, as I’ve used it myself many times.
Short version:
Open file, save as PSD if necessary, make copy of layer
Blur image (Filter/Blur/Gaussian, 6-12 pixels)
In History panel, take snapshot and name accordingly
Go back one step
Select blurred snapshot
Use History Brush tool to paint blur back in (Lighten mode on dark spots, and vice versa)
For this and a lot more, try our Photoshop training.