How to Deal with Dust in Photoshop Images
Adobe, Photoshop
In the age of digital photography, dust would seem to be a thing of the past. Perhaps. But who knows how many pre-digital pictures still exist, un-digitized, and in need of cleaning? With this in mind, I’d like to show you how.
Before we had digital cameras, Photoshop, and so on, one would have to clean the film very carefully, print the picture, and use a kind of watercolor called spotting dye to touch up the (hopefully few) white spots caused by dust on the negative. (Yes, I did it.) It’s not too hard, but it is tedious, and requires patience and a steady hand. Photoshop, of course, removes the need to do the spotting by hand, but how to actually deal with the dust spots?

With an image open, you could just borrow nearby color with the Eyedropper tool, then use the Brush to tap color into the white bits. This does work. But there’s a slightly more subtle technique which works better, is a little faster, and doesn’t need any eyedropper-ing.

First, select a few spots (to start with, do one or two at a time). You want to make your selections only about half again as large as the dust spots. Any selection tool is fine; with roundish spots, the Ellipse Marquee tool works well.
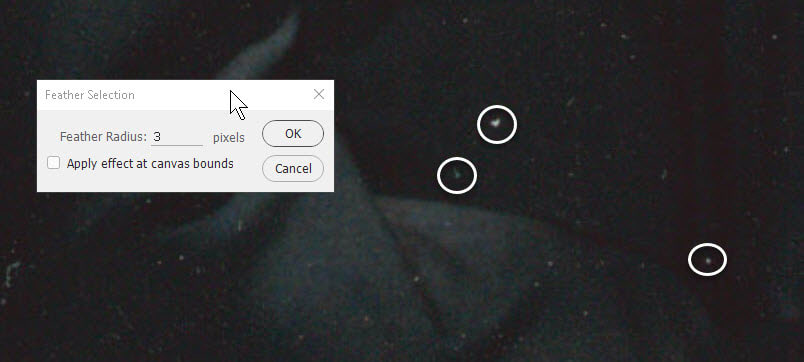
Then, go to the Select menu, Modify, and Feather command. We want to feather the selection by at least a few pixels, though we normally don’t need much more unless the dust spot is big. About three or four pixels’ worth will do.

Next, we go to Filter–>Blur–>Gaussian Blur. What we want is to “smear” the “paint” immediately around the spot onto it, but soften the edges of the smear to make it very gradual, and therefore hard to see. This is where there might be a little experimentation; the nice thing about the Gaussian Blur is, one can control how much blur there is. Sometimes it works with just a few pixels’ worth; sometimes it can take as much as eight or nine. The tricks are to keep the initial selection just a little larger than the dust spot, and feather the edge (either before selecting, in the Control panel, or right after with Select–>Modify–>Feather) prior to blurring. We do NOT want sharp edges here at all.
And don’t worry if it takes some practice to get right. Maybe make a copy of the layer containing the picture, for insurance. Then go for it.
To learn more, check out our Photoshop classes.