How to Fix the Moiré Effect in Photoshop
Adobe, Photoshop
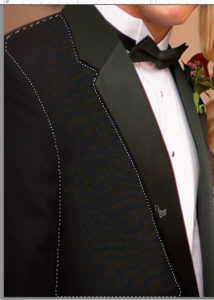
One of the more subtle problems in digital photography is something called moiré. It looks rather like a slight mesh of light and dark lines, sometimes curved, sometimes straight. Certain kinds of fabric produce this effect when one takes pictures of, say, people in suits. Silks are among the biggest culprits, and wedding images can abound with it. Luckily, there’s a bit of work we can do in Photoshop to greatly reduce the visibility of moiré.
We start by opening the picture and selecting the area with the moiré effect. We want to use a couple of pixels of feather, so as to blend the edges and make our fix unobtrusive. (Using the Magnetic or Polygon Lasso is usually a good choice for irregular shapes.)
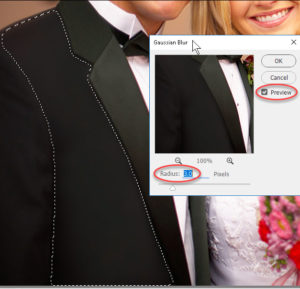
Then we apply Filter->Blur->Gaussian Blur—the amount is controllable, so it’s useful for this sort of thing. Two or three pixels, again, is enough in most cases, but use the Preview to check before OK-ing. This often zaps most of the moiré right out of the gate.
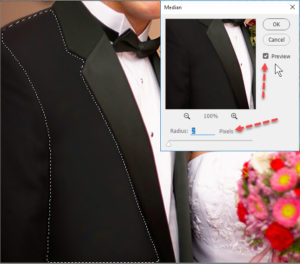
Another filter we can apply, oddly enough, adds a bit of “noise” to the picture. But if we do this, with Filter->Noise->Median, after the Gaussian Blur, it smooths the moiré further rather than making it worse. Best to apply about as much Median noise as we did Gaussian Blur for starters.
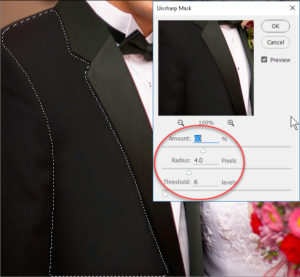
Finally, we sharpen—again, a little—with the Unsharp Mask. About 60% or 70% will work here. It shows a hint of the fabric weave without the moiré returning.
Remember, when you’re experimenting on an image, a little effect at a time often works better. One cool trick with the Unsharp Mask is to apply a lower Amount percentage more than once. This makes edges clearer without exaggerating their contrast too much. So instead of 150%, use 50% three times, and the effect will be almost the same, but smoother and less obvious. And by feathering the selection right off, we make sure the change doesn’t show “edge”.
This is one of many things you can pick up in our Adobe Photoshop class.


