How to Reduce Image Glare in Photoshop
Adobe, Photoshop
Got a real-life question from someone this time, regarding how to fix glare. It’s a fairly typical problem in some images. Reflections off shiny surfaces, lights accidentally pointing toward the camera, even some kinds of glossy fabric, or curved glass acting as a lens can distract, if not irritate, the viewer (and the subject, and the photographer).
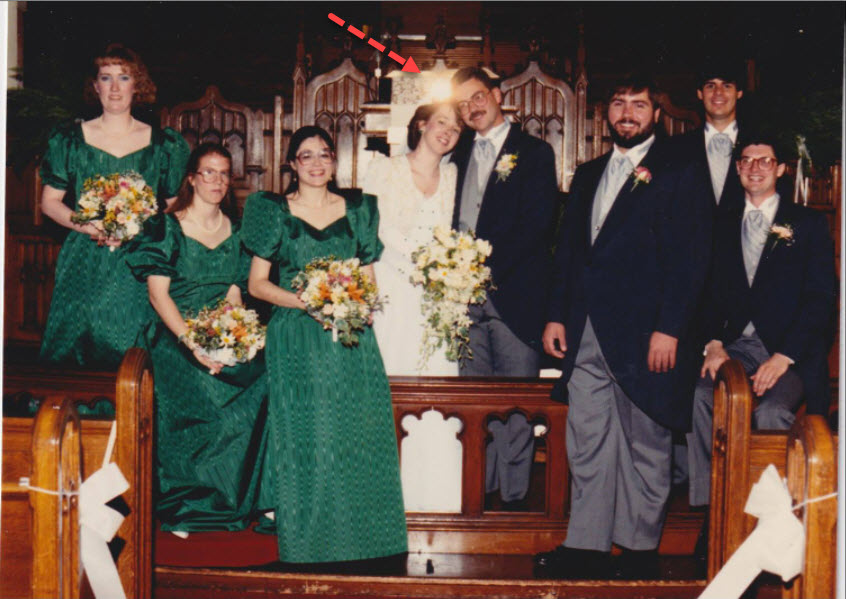
Here’s a wedding picture with just this kind of problem. Just above the bride’s head, we’re getting a spot of unusual brightness. (The lady asked, “Can you adjust my halo?”) Obviously, we want to tone the glare spot down as much as we can without making it obvious. (Don’t forget to save the image as a PSD first, to maximize your tools’ abilities!)
ADJUSTMENTS
As with most images, there are two or three solutions we can try. One would be to use a Brightness/Contrast adjustment layer.
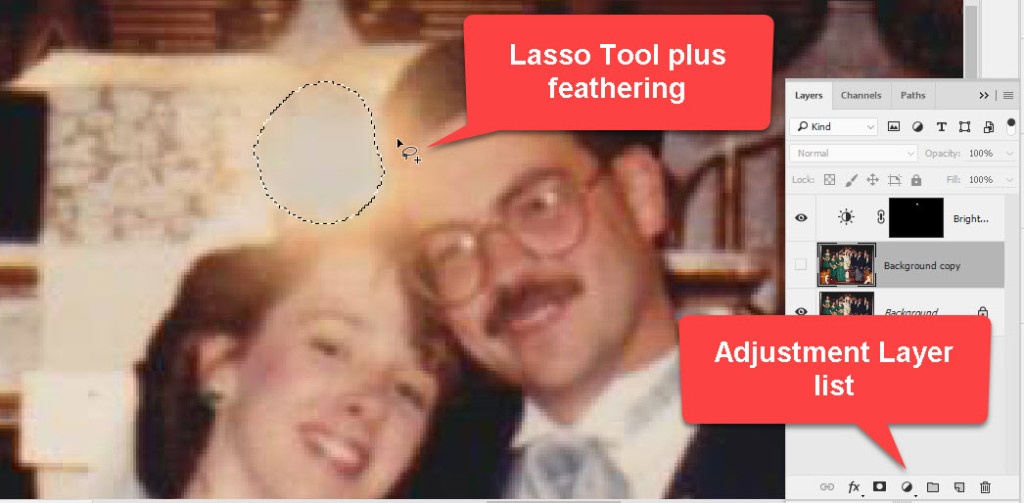
We select the glare, feather the selection (perhaps four pixels), and add the adjustment layer from the Layers drop-down list.
Then, we slide the brightness control to the left (you can use the Legacy setting or not, depending on your preference) till we drop the intensity to about the same as the surroundings.

Certainly a little better. But it’s not just the glare in the middle we need to fix. There’s a sort of secondary circle of yellowish light around the main spot. This “other” problem might need a more detailed technique. Still, we want to keep it simple.
CLONE STAMPING
The easiest thing here would be to Clone Stamp from the bits just outside. The couple’s hair, the decor on the podium—these we can borrow and not have the effect be too obvious.
The actual clone stamping is just time and zooming in, so one can work comfortably in detail. But the essentials are these:
First, I copied the Background layer (with the image) and made sure to work with the copy. This keeps the original backed up and lets me compare my work with it.
Then I zoomed in to where I can just make out the individual pixels. This way I can see how wide to make any painting tools.
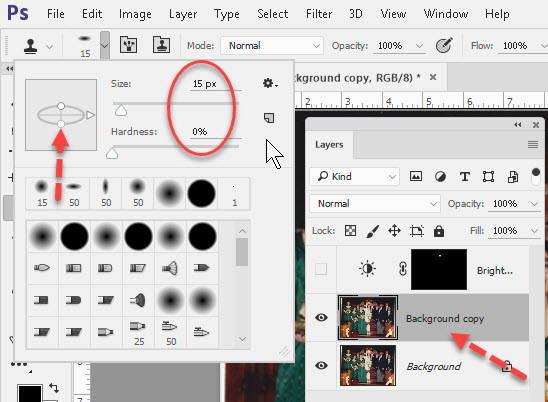
I adjusted the size and hardness of the Clone Stamp tool to fit the glare areas. I used about 15 pixels’ diameter, with 0% hardness for blending. (Rule of thumb is I often start with a tool size about a third the width of the working area. This way I don’t smear outside the lines.)
I also changed the tool’s shape from circle to oval, to work in the narrow areas around the bride’s and groom’s hair. (We can do this in the Clone Stamp “brush” dropdown control.) I extended the hairlines up, down, and out a bit to restore what the glare knocked out.
CHECKING RESULTS
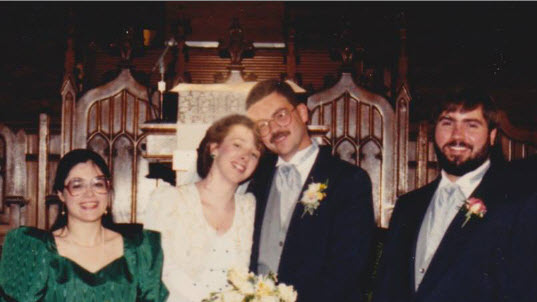
At this point I turned the Adjustment layer on and off a few times to see if I still needed it. Thanks to cloning the surrounding areas, which don’t have any glare or yellow, the answer seems to be no. So I can leave it off, or even delete it.
The critical thing is, since I ended up clone stamping, I made sure to copy the content layer. This is both for comparison and for safety, as a backup.
For more on Photoshop and the other Creative Cloud programs, check out Adobe Photoshop courses here.