Working with Image Size and Canvas Size in Photoshop
Adobe, Photoshop
The Photoshop features called Image Size and Canvas Size can be a little confusing. The names are similar, and at first glance what they do will seem to be also. And both are on the Image menu. But the two controls do something quite different from each other, and understanding how can be helpful.
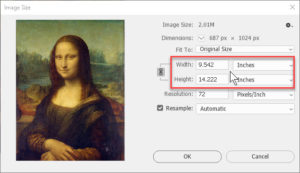
Once we open a sample document, we can try using each one. First, Image Size. This feature can change two main things—(a) the size, in height and width, of the printed image, and (b) its resolution, or level of detail in pixels per inch.
Since it can affect the number of pixels, regardless, it affects the amount of information in the file, and therefore, the file size on disk. The key point is that when we use the Image Size dialog to change height and width, we are “stretching” or “squishing” the image as if it were printed on taffy. We are not adding more “canvas” around it (background) or trimming any off (cropping). Aside from the resolution, we are not changing the image itself.
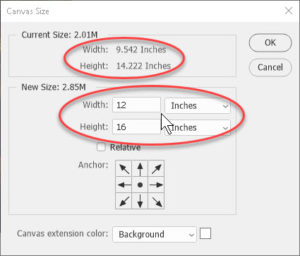
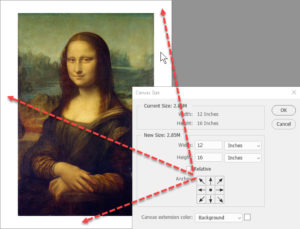
But the Canvas Size feature can. If we bring up this dialog, we are now either adding “blank” space around the image (if we increase the size) or cropping part of the image (decreasing). Think of unrolling new canvas from underneath, or cutting it away. We cannot change resolution with this feature, but this is not a problem.
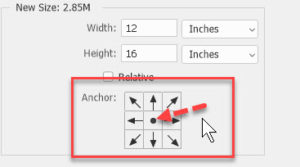
We can, however, determine where the new blank space goes, or where the crop will do its thing. The Anchor feature allows us to say if the expansion will start from top, bottom, side, corner, or center. And if we reduce the size, where it will “aim” toward.
So if we want to create a composite image, but not have pieces overlapping, Canvas Size offers us one option. If we need to resize an image to fit height and width, Image Size can come into play as well.
To see how to use this and many other features, check out our Adobe Photoshop training.


