Slicers in Excel PivotTables
Microsoft Excel, Microsoft Office
When Excel 2007 was introduced, the PivotTable Field List included a “Filter” area, where one could drop a field to use as a filter (for example, year, brand name, size, etc. from a block of sales data). If the user filtered for one year, or one brand, the name of the item was visible in the space above the body of the table. But if more than one item is in there, all it says is “multiple items”…and not which ones. The feature worked, but couldn’t take this into account. So in Excel 2010, and all versions following, the Slicer feature is standard. (No, I don’t know where they got the name. Sounded a little odd to me, too….)
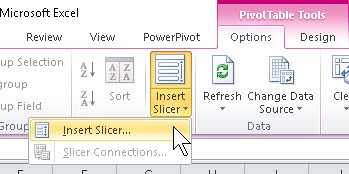
Creating one or more slicers is dead simple. Make sure you’ve clicked somewhere in your PivotTable or –Chart, go to the PivotTable/Chart Tools Options tab, look in the Sort and Filter group, and click Insert Slicer.
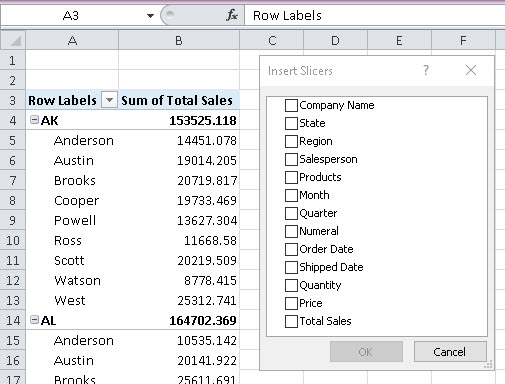
You’ll need to choose which fields you want to filter with. Usually it’ll be at least a couple, one of which will often but not always contain values. And when you’ve selected, click OK.
Done. Using the slicers is also easy. Click on the thing(s) you want to filter for (i.e. see), and they stay visible. Everything else hides.
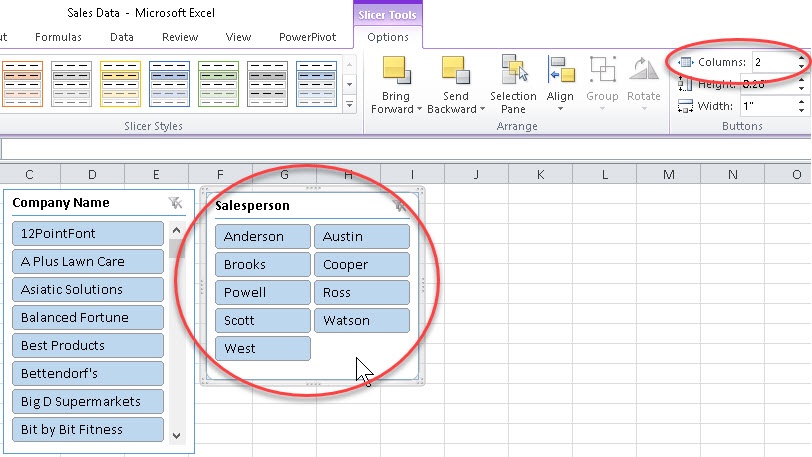
But there is one neat extra tucked in there. Aside from the fact that the slicers print (they’re a WYSIWYG item), and you can resize them, you can change the number of columns of buttons per slicer, which means you can show more of them at once, and save some screen (and print) space.
And that means you can use them to the fullest, because most of the time, any user who looks at your printout can see what you filtered for! No muss, no fuss.
Slicers are one of my more favorite features in Excel. They’re a good answer to a reasonable question (filters you can see and know what they’re filtering for), and they’re easy to use. They help content be more user-friendly, and even in a static situation (printout or PDF), they retain their usefulness.
For more on this and other features, take a look at our Excel classes.