Font Matching: New to Photoshop 2015.5

Have you ever seen an ad before and wondered what font was being used? That’s probably not the type of question you ask of just anyone, but in the world of graphic design…well that’s a different story. The latest release of Photoshop, 2015.5 June release …

Read More

Photoshop Image Adjustment Layer

The art of photography has changed dramatically with the advent of the smart phone. Today everyone is a photographer, and pretty much all of those photographs need some adjustment. Enter Photoshop with the ability to adjust your pictures in a non-destructive way. The Adjustments Panel …

Read More

Change Colors Using Blending Modes in Photoshop

There are times when everything about the picture you’ve just taken seems to be perfect. Then, when it comes time to use it, you discover one key color just doesn’t work. Or you need the same item in more than one color.

Using Photoshop one solution is to apply the color needed to a new layer and change its Blending Mode.

Take our automobile example for instance. The photograph captures the essence of the car but the ad needs to feature a new, hot color.

telsa-base-color

Our first step is to add a new empty layer above the car layer. There are several ways to do this but we are only going to mention one which is the keyboard shortcut; Ctrl+Shift+N on Windows , or Cmd+Shift+N on a Mac.

This adds a new layer above our background layer. We’ll rename this new layer “paint job” by double clicking the name in the Layers Panel and typing the new name in its place.

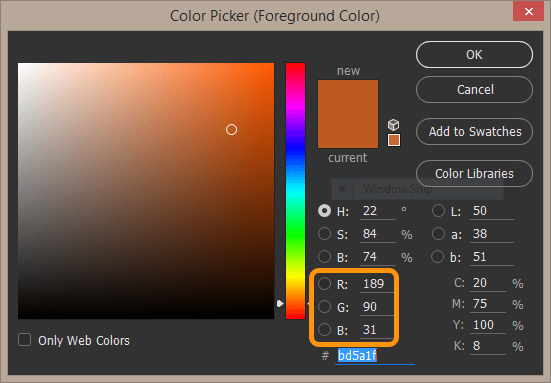
Next we’ll change the foreground color in the Tools Panel to the new color we want on our car. If you know the RGB color value you can click the foreground color swatch to open up the Color Picker Panel. Then type the RGB values in the appropriate location and click OK.

tesla-color-picker-window

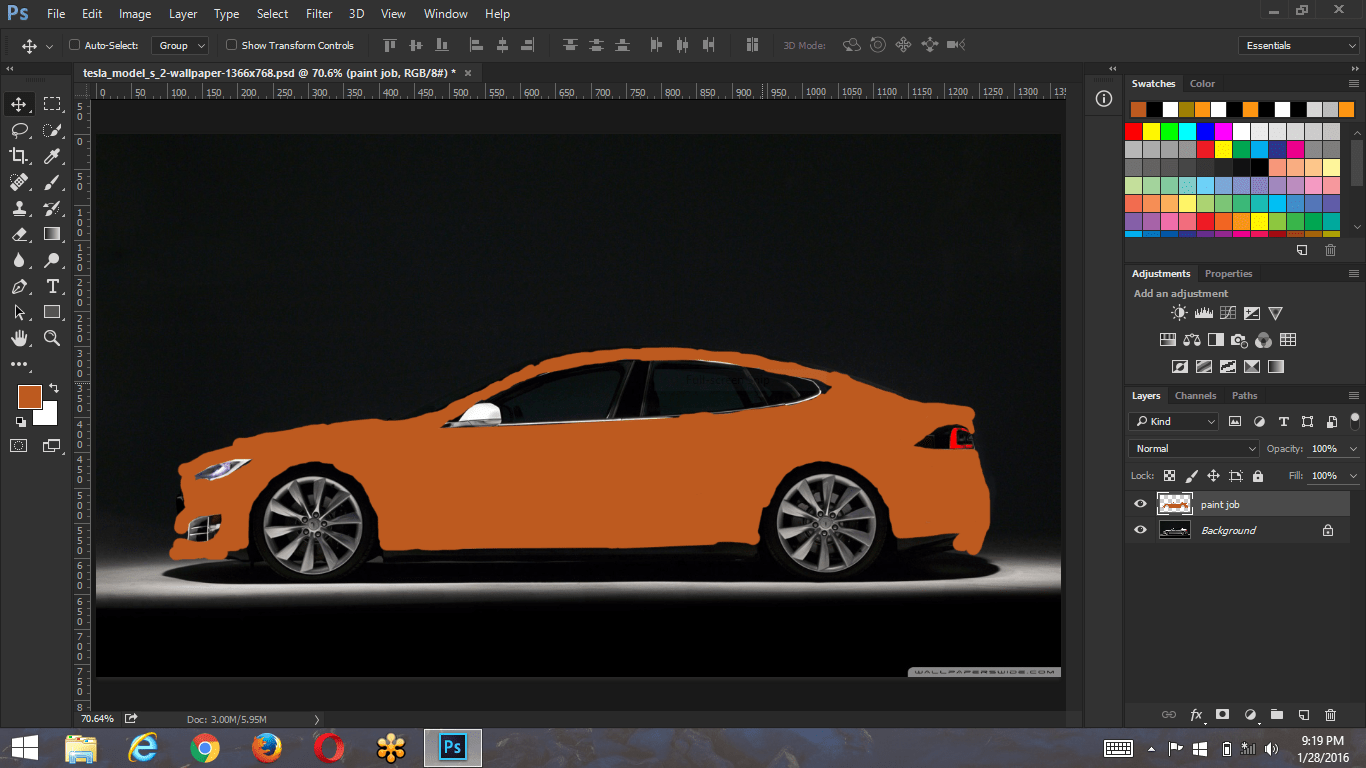
With a new layer in place and the color we what selected the next set would be to use the Bruch Tool to paint over the car on the new layer. It doesn’t have to be perfect, we can clean things up later.

tesla-color-layer

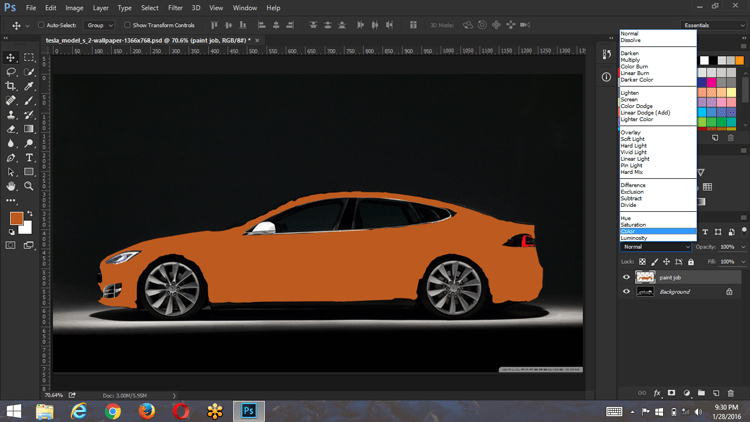
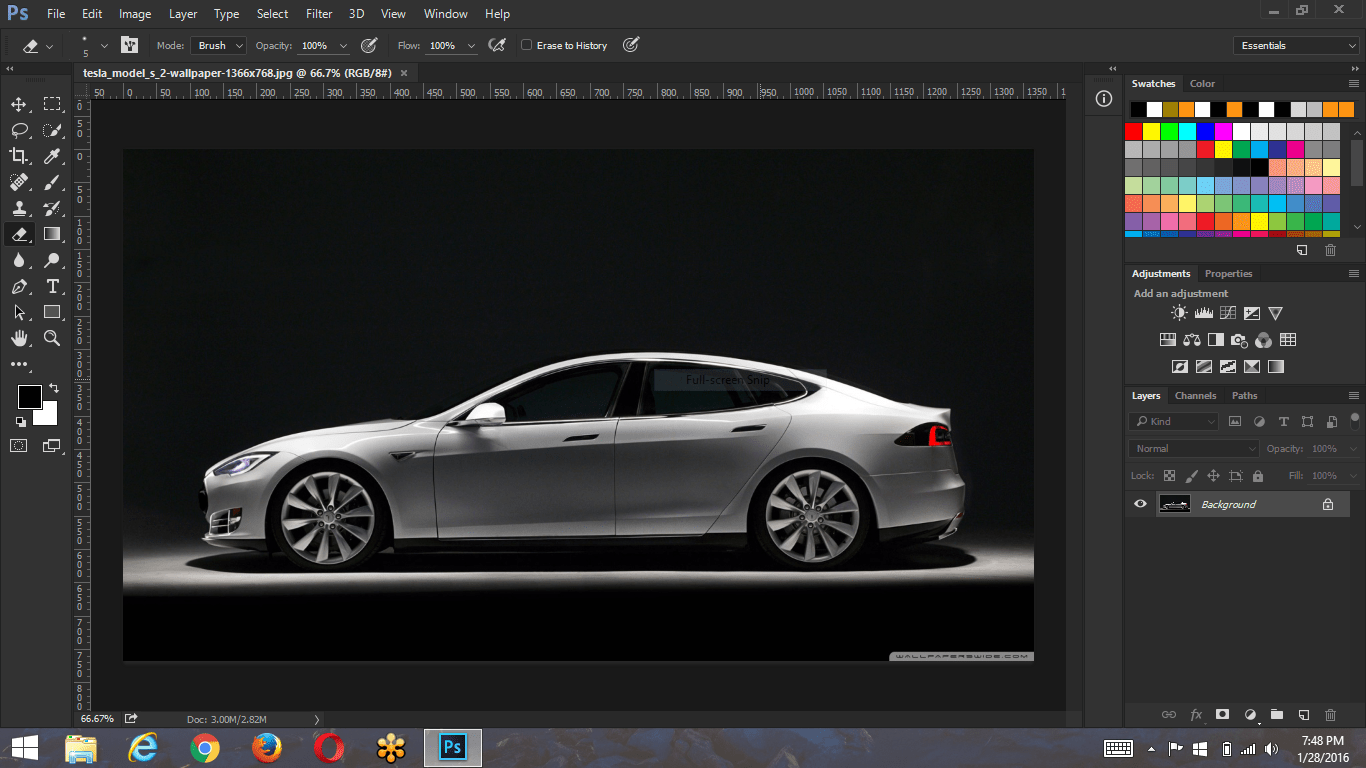
The magic happens in our next step. Once we’ve painted over the existing color and it looks like our next example image we change the Blend Mode of this new “paint job” layer from Normal to Color.

tesla-blend-mode-menu

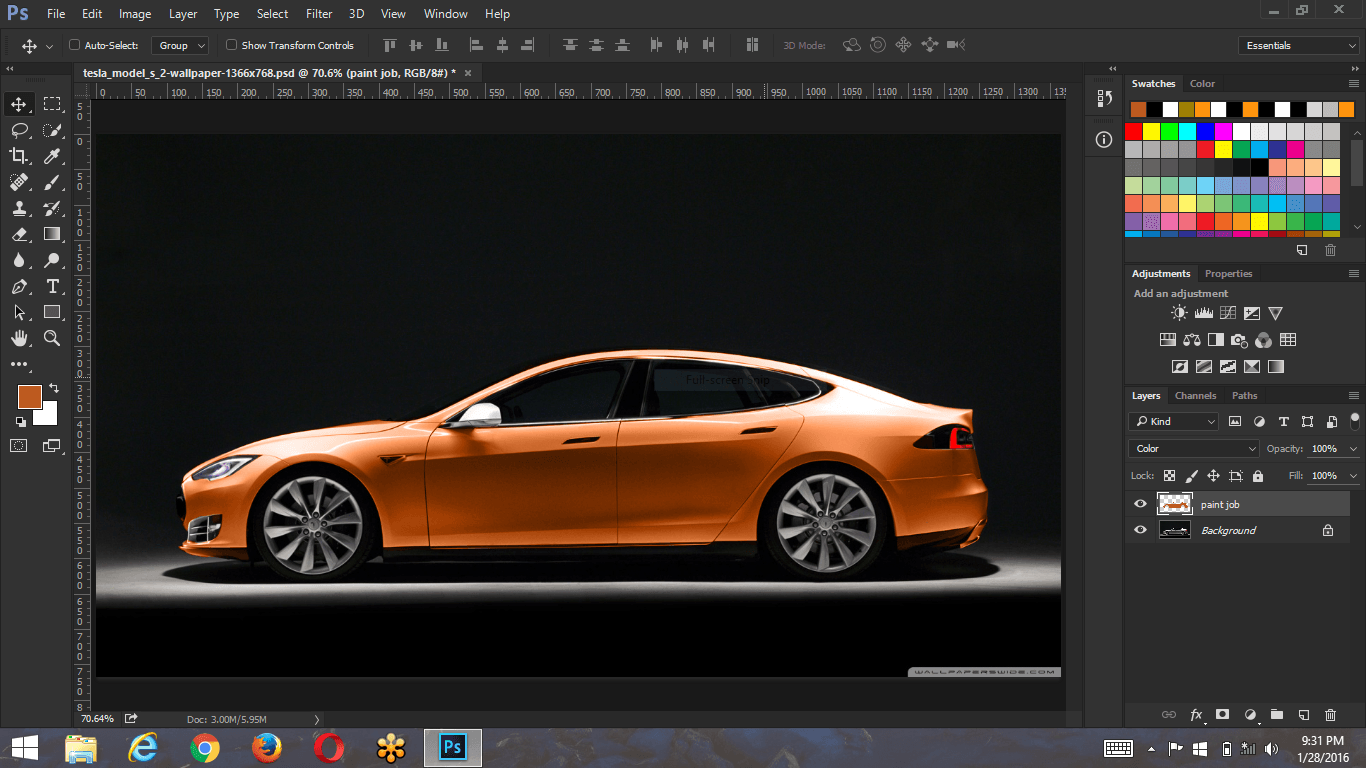
Voila! A new car with a new paint color. There may be a little clean-up work needed on the “paint job” layer, but that can be handled with the Eraser Tool.
tesla-blend-mode-color

Read More

Photoshop Interface Easter Egg

Easter eggs in software have been around since 1978. The term was made popular by developers at Atari after game designer Warren Robinett placed his name as a hidden message within the game Adventure. Finding the message was like going on an Easter egg hunt.

Today, Easter eggs are hidden gems within software applications, operating systems, and DVDs. The developers at Adobe are no strangers to this concept.

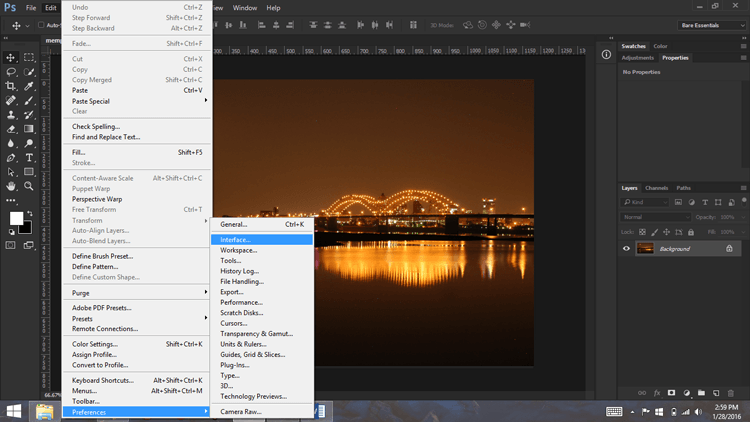
The new dark interface settings within Photoshop have given the development team a wonderful location to place an Easter egg. To get to these settings we need to open the Preferences panel and we can do so by selecting Edit > Preferences > Interface on a Windows computer, or by clicking the Photoshop menu and going to Preferences > Interface on a Mac.

edit-preferences-interface

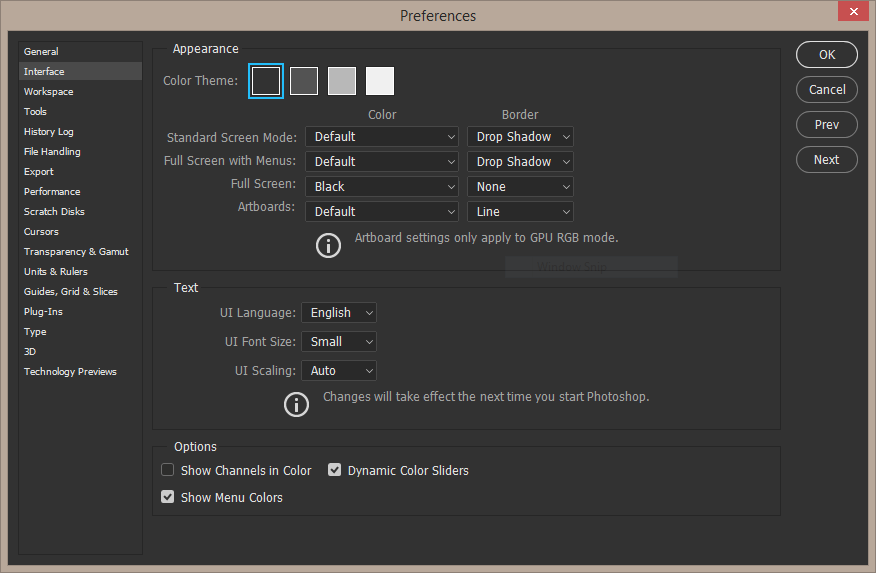
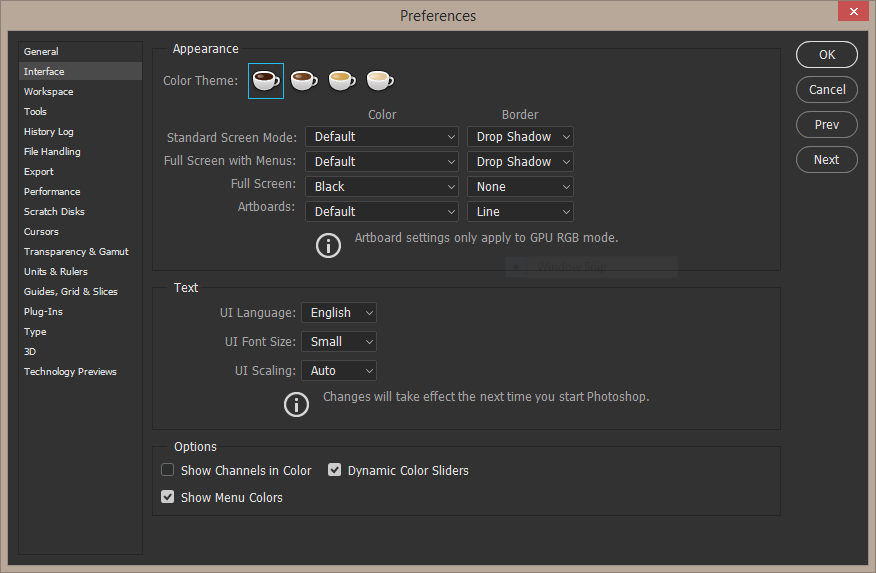
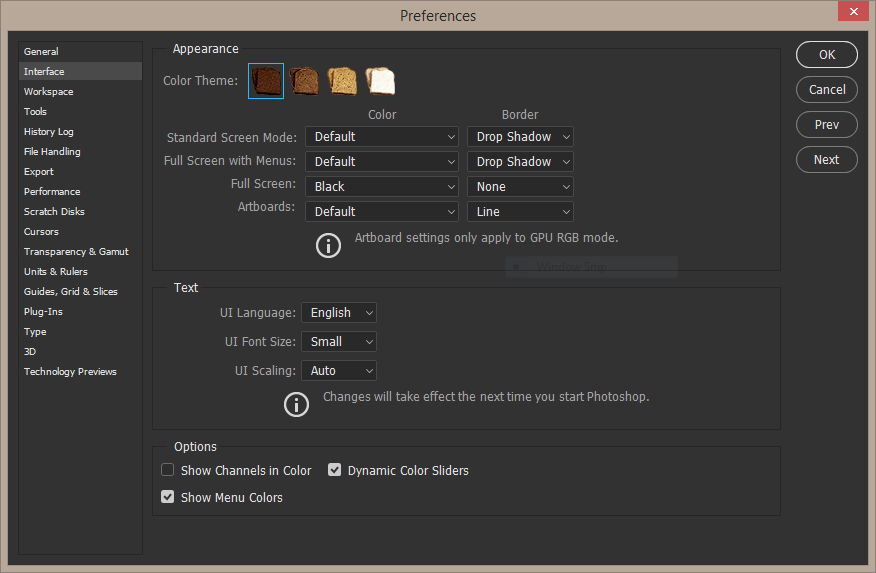
Inside the Interface portion of the Preferences panel there are four square buttons at the top of the dialog box. They represent our four different color settings. Clicking on each one allows you to lighten or darken the UI (User Interface). The Easter egg is changing those buttons to either coffee cups or slices of toast.

photoshop-preferences-interface-default

Hold down Ctrl+Alt+Shift on Windows or Cmd+Opt+Shift on a Mac and click on one of the buttons…they change into coffee cups. Do the same thing again…they change back into square buttons. One more time…they change into slices of toast. A fourth click while holding down our key combination and they return to square buttons.

photoshop-preferences-interface-coffeecup

photoshop-preferences-interface-toast

Read More

Photoshop; Finding an Image Center

There are times when it would be helpful to find and mark the exact center point of an image. Let’s discuss a few ways this can be done.

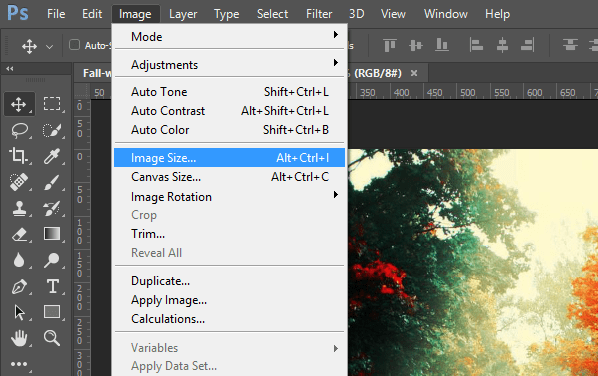
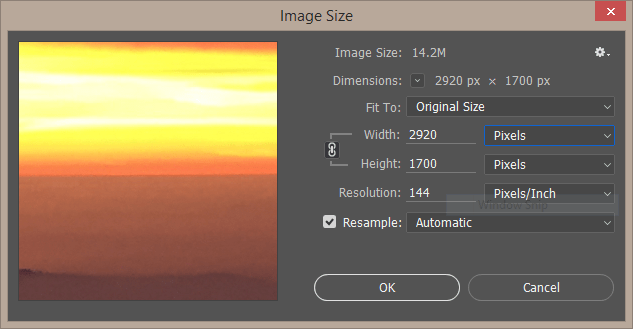
The most manual way of doing it can be done by opening the menu option, Image > Image Size, or using the keyboard shortcut Ctrl+ Alt+ I on Windows, or Cmd+ Opt+ I on a Mac. Using the width and height you can determine the halfway mark and drag a couple of guides into place.

image-size-menu

image-size-dialog-box

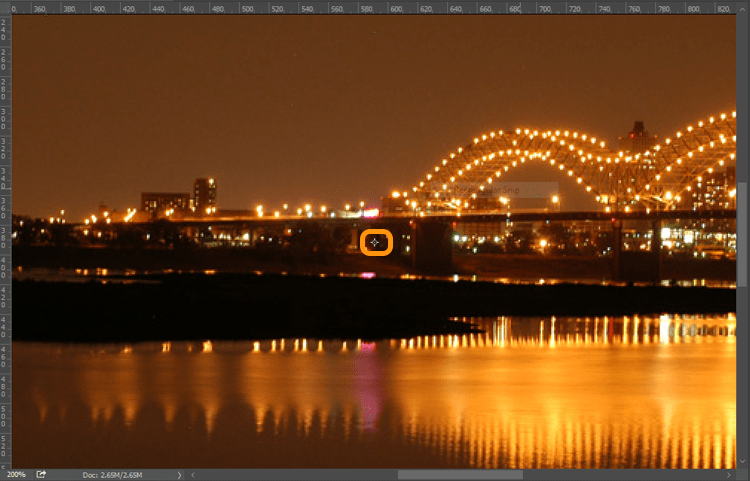
Another way of doing this would be to open the image. Show the rulers either using View > Rulers in the menu or the keyboard shortcut Ctrl+ R on Windows or Cmd+ R on a Mac. Then using the menu option Select > All or Ctrl+ A on Windows or Cmd+ A on a Mac, select the entire layer. Using the Move Tool check the Show Transform Controls checkbox in the Options bar. You should now see a “target mark’ in the center of the image. Drag a horizontal and vertical guide to this position and you are set.

target-mark


How about a third option? Using the same first two steps as the above method, while the background layer is selected, choose Edit > Free Transform in the menu, or Ctrl+ T on Windows, or Cmd+ T on a Mac. This will show the same “target mark” in the center of the image. Place your horizontal and vertical guides and you are good to go.

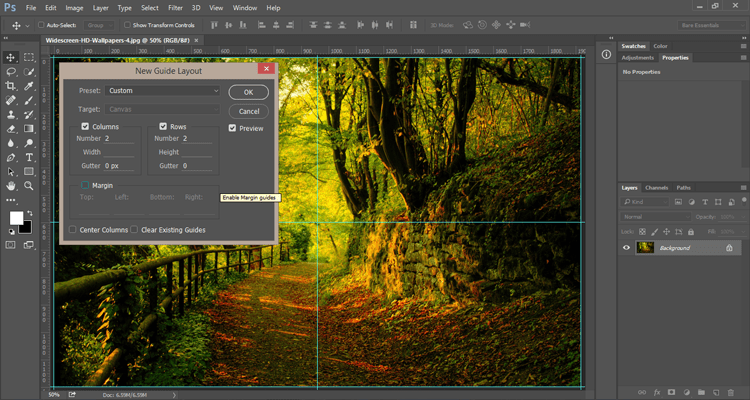
Here’s one last way of showing and marking the center of an image. Using View > New Guide Layout in the menu, select two rows and two columns with a 0px gutter for each, click ok and you are done.

center-point-guide-layout

Read More

Creating Fractions, Adobe Photoshop CC 2015.1

Photoshop’s Glyphs Panel can create custom fractions. In a previous post we talked about the newly added Glyphs Panel to Adobe Photoshop CC 2015.1. Now let us take a look at using fractions from this panel. Most fonts will supply a few fraction glyphs like …

Read More

Glyphs Panel, Adobe Photoshop CC 2015

A Glyphs Panel has been added to Photoshop Those of you that use Illustrator or InDesign have had access to this panel for some time now. But, Photoshop for some reason has taken it’s time in making it available. Well, it’s finally here! The June …

Read More

Quick Export, Adobe Photoshop CC 2015.1

Export artboards, or layers using Quick Export Photoshop has offered numerous file options for saving an image over the years. Selecting File > Save As from the menu currently offers over 20 different file formats. Frequently there is the need to save images for publishing …

Read More